- Messages
- 38
- Reaction score
- 132
- Arrma RC's
- Typhon 6s
The short back story: have been into RC as a now and then hobby for a few years. Have always wanted an Arrma, and a buggy, and caught a great deal on a still brand new V2 Typhon 6s that I couldn't pass up. Immediately fell in love!
I've been wanting to do a build, but wasn't comfortable enough in my knowledge, but finally said screw it! After a bit of research, ended up going for a Kraton. Told my wife why I'd be getting packages for weeks/months and she simply said "I don't care what you do, so long as the bills get paid" Have I mentioned that I love her! haha She also said that she didn't want to know what it cost (thank God)
And so it began...
Parts List:
v4 Kraton 6s roller
M2c chassis
M2c motor mount
M2c skid plates front and rear (might not run with the TBone)
M2c droop screws
Voltage front and rear braces
Voltage rear suspension mounts
Voltage ackerman
Alza front suspension mounts
JBIRC servo plate
JBIRC wing/brace support
JBIRC servo mount
RPM arms all around
RPM mud guards
TBone wing mount
TBone front bumper
TBone wheelie bar
Amped carbon fiber center brace
ScorchedRC Titanium towers
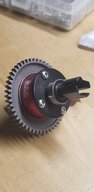
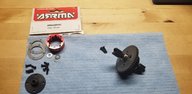
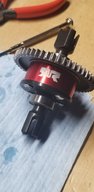
Arrma metal diff cup for center
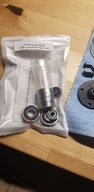
Jim's bearings kit
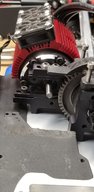
Hobbywing Max6 combo with the 1650
Tekno 20t pinion
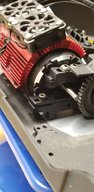
YR dual fan heatsink
WTF 30mm fans x 2
Alza carbon fiber fan grills
**Savox SB-2292SG (waterproofed)
Typhon V4 wing
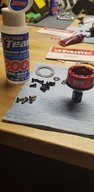
100/200/80 diff fluid
Spektrum DX5C w/6100 reciever
Yoga Matt added to battery tray (strongly recommend this as it helps with the batteries)
I think that rounds it out, but sure I'm forgetting something.
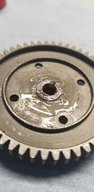
I'll post more pictures and some areas that I got hung up on when I can. Will also continue to update this thread as the build SLOWLY progresses (not a lot of free time).
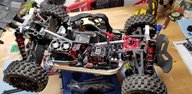
So far I'm extremely happy with the way this build is coming along and I think it's making for one badass Kraton (The Kraken)
**Edit: forgot the servo, so added it in


I've been wanting to do a build, but wasn't comfortable enough in my knowledge, but finally said screw it! After a bit of research, ended up going for a Kraton. Told my wife why I'd be getting packages for weeks/months and she simply said "I don't care what you do, so long as the bills get paid" Have I mentioned that I love her! haha She also said that she didn't want to know what it cost (thank God)
And so it began...
Parts List:
v4 Kraton 6s roller
M2c chassis
M2c motor mount
M2c skid plates front and rear (might not run with the TBone)
M2c droop screws
Voltage front and rear braces
Voltage rear suspension mounts
Voltage ackerman
Alza front suspension mounts
JBIRC servo plate
JBIRC wing/brace support
JBIRC servo mount
RPM arms all around
RPM mud guards
TBone wing mount
TBone front bumper
TBone wheelie bar
Amped carbon fiber center brace
ScorchedRC Titanium towers
Arrma metal diff cup for center
Jim's bearings kit
Hobbywing Max6 combo with the 1650
Tekno 20t pinion
YR dual fan heatsink
WTF 30mm fans x 2
Alza carbon fiber fan grills
**Savox SB-2292SG (waterproofed)
Typhon V4 wing
100/200/80 diff fluid
Spektrum DX5C w/6100 reciever
Yoga Matt added to battery tray (strongly recommend this as it helps with the batteries)
I think that rounds it out, but sure I'm forgetting something.
I'll post more pictures and some areas that I got hung up on when I can. Will also continue to update this thread as the build SLOWLY progresses (not a lot of free time).
So far I'm extremely happy with the way this build is coming along and I think it's making for one badass Kraton (The Kraken)
**Edit: forgot the servo, so added it in
Last edited:
") .
.