Kraton Devin’s Kraton 6s EXB All Show, Plus Go!!!

This site may earn a commission from merchant affiliate
links, including eBay, Amazon, and others.
I actually haven’t rebuilt the rear shocks yet. They are sitting there de anodized and polished just waiting for me to rebuild them with the m2c parts.
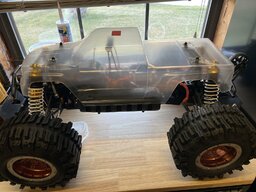
By the way I’m not real crazy about the Butte bash body as it’s not very wide and I might not be able to install the new Outcast side skirts I got without major modifications. I’m already looking at the Jconcept’s finnisher body for that reason
 
Made some more progress today, got the rear shocks built and installed plus I got a shim kit in today that I ordered to take the play out of the justbashit 17mm hex adapters. The rear has the Treal aluminum hubs on it and it was pretty straight forward it took a .3 shim per side. The front has hot racing hubs and one side took a .2 shim and the other took a .3 plus a .1 to make it .4 which took out the slop. I think that’s kind of a testament to the two different manufacturers and shows me that Treals tolerances are precise as where hot racings stuff is all over the place. I had already bought the hot racing hubs before I found out about the treal ones though so I will stick with them for now but wish I had the Treal ones on the front too. When I was done with that I started work on fitting the justbashit battery tray. I bought the one without the receiver mount because it was only half the price of the one with it which means I’m having to do some cutting and grinding to the receiver box but I think that it will fit fine when I’m finished. The battery tray I bought makes me wonder if Arma use the different receiver box on previous models, if anybody knows please chime in and let me know as I may just order one of those eventually.

What’s left now is to finish the battery tray/ receiver mount, fit the BQ carbon fiber esc mount and then start installing the electronics and custom fan setup I got for it. If I don’t have any setbacks I should have it up and running very soon.

57603026-E9C6-4C7D-B722-E486FC01B180.jpeg


FA162130-5ABD-4995-AF1D-3A909223CE2C.jpeg


ACD8A134-362F-475A-B87F-59B91982F6D2.jpeg
 
This is how I plan on running the batteries if I can get them strapped down. I’m going to have to use Velcro on the smaller battery and possibly find some longer straps

3E0E2A18-1FC5-4EF0-9CA5-0D0DAEC9A87C.jpeg


49E3ADB4-F43F-4590-9137-0F336D7D7E10.jpeg

I might actually abort the plan for the aftermarket battery holder altogether for now as the stock one seems to fit better with my configuration

image.jpg

Got rid of the Arrma logos on the rear wing.

3291E4B5-35A4-4C56-8D38-595B96C141DF.jpeg
 
Last edited:
Loving this build. Similar build list to what i'm looking to do with my Kraton V5...PPS motor mount, Basherqueen towers, M2C Braces, etc. I also was thinking of stripping the red anodizing as well. Heh.
Was originally looking at Hot Racing bulkheads, but am interested to see how these Treal ones work out. They look like quality pieces. Subscribed...
 
Took some time away from RC to restore my my Dodge Ram but now that I’m almost done with that it’s time to get back on this kraton and finish it up. Started mounting the electronics and working on fitting the battery tray yesterday. More to come soon.

image.jpg


image.jpg
 
You don't play around. (y)
Very nice build thread here.
Enjoy.
:cool:
 
OK so I’m finally finishing up this build and I’ll post some pictures but I’ve got a couple questions. The front end of my Kraton looks really towed in. What is the easiest fix? This thing is super heavy. I just ordered some of the heaviest Tekno springs that fit. Will it be enough? I’ve noticed chassis slap really hard when I drop it from about 3 feet in the air. I also removed the castle ESC motor combo and went with the hobby wing Maxx6 as it fits a lot better, and actually mounts to the tray I have instead of using double sided tape.

image.jpg


image.jpg


image.jpg
 
Adjust the toe by your adjustable toe-link turnbuckles? 🤔
I thought I remembered People talking about removing the metal spacer on the bottom suspension link to bring it in that way instead of moving the top one out which will possibly throw a driveshaft. Was hoping someone would chime in on that.
 
I thought I remembered People talking about removing the metal spacer on the bottom suspension link to bring it in that way instead of moving the top one out which will possibly throw a driveshaft. Was hoping someone would chime in on that.
I do believe you meant camber, and not toe…🫣
How bad is it? Can you take a photo from about two feet away looking straight at the vehicle from the front, and where the camera lens is the same height as your front diff outdrives by chance?
 
I do believe you meant camber, and not toe…🫣
How bad is it? Can you take a photo from about two feet away looking straight at the vehicle from the front, and where the camera lens is the same height as your front diff outdrives by chance?
It’s at roughly 5° currently

image.jpg

It’s at roughly 5° currently

image.jpg
I guess I will just adjust the top out and put some of the spacers back in it for now. Hopefully it doesn’t throw driveshafts.
 
My man…. even better.. Yep, that’s exactly what I’d recommend. Back those upper pillow balls out until you’re at about -1.5’ or so. Then check your plunge into the outdrives as you cycle the front suspension from full compression, to full droop. You’ll be able to clearly see if it’s anywhere even close to spitting axles… From what I could see of the plunge in the head on photo prior to your last two; I doubt you’re going to have an issue, but definitely VERIFY. 🤙
 
My man…. even better.. Yep, that’s exactly what I’d recommend. Back those upper pillow balls out until you’re at about -1.5’ or so. Then check your plunge into the outdrives as you cycle the front suspension from full compression, to full droop. You’ll be able to clearly see if it’s anywhere even close to spitting axles… From what I could see of the plunge in the head on photo prior to your last two; I doubt you’re going to have an issue, but definitely VERIFY. 🤙
Thank you
 
You will want to do it at your intended ride height with the tires on the table front, and rear. After you have the camber where you want it at your intended ride height (I know you mentioned changing springs as well, so your best guess), then you can center your steering at the steering link at the servo, then set your toe at your turnbuckles. 😎
Thank you
No sweat brother! Looks like a killer build, and you’re on the home stretch!
 
Take the shiny spacer off the lower part of the suspension to improve the camber and possibly put a single washer/spacer on the upper ball. It will get you much closer. Putting too many spacers on the top will add slop to the driveshaft.
 
By the way, I just put it on the scale and it tips in it over 14 pounds with the 6S battery in it. That’s more than twice as much as my Mugen race truggy. Lol

image.jpg

The only RC I have that weighs more than this is my highly modified HPI savage XL
 

Attachments

  • image.jpg
    image.jpg
    320.6 KB · Views: 14
By the way, I just put it on the scale and it tips in it over 14 pounds with the 6S battery in it. That’s more than twice as much as my Mugen race truggy. Lol

View attachment 337795
The only RC I have that weighs more than this is my highly modified HPI savage XL


I’m not surprised! My pumped up Talion is a fat pig compared to either of my Tekno 2.0’s lol..
 
It’s at roughly 5° currently

View attachment 337794

I guess I will just adjust the top out and put some of the spacers back in it for now. Hopefully it doesn’t throw driveshafts.
You can’t even get close to an accurate measurement with the wheels in the air. You’re probably nowhere near 5°
You will want to do it at your intended ride height with the tires on the table front, and rear. After you have the camber where you want it at your intended ride height (I know you mentioned changing springs as well, so your best guess), then you can center your steering at the steering link at the servo, then set your toe at your turnbuckles. 😎
What he said! 👆
 
OK so I’m finally finishing up this build and I’ll post some pictures but I’ve got a couple questions. The front end of my Kraton looks really towed in. What is the easiest fix? This thing is super heavy. I just ordered some of the heaviest Tekno springs that fit. Will it be enough? I’ve noticed chassis slap really hard when I drop it from about 3 feet in the air. I also removed the castle ESC motor combo and went with the hobby wing Maxx6 as it fits a lot better, and actually mounts to the tray I have instead of using double sided tape.

View attachment 337729

View attachment 337730

View attachment 337731
Was just looking at the pics again, she’s a pretty build.
Might want to double check your receiver connections. It looks like you have the ESC in channel 1 and the servo in the battery port? Might just be the angle I’m looking at it, though.
The HW system looks great in there and matches your black and silver theme nicely.
I got it right before I plugged it in. I may have had it wrong originally. Only problem I’m having now is trying to figure out this Futaba T3PV. I love Futaba, but this is the worst one I’ve ever owned programming wise and it’s been a while since I’ve messed with this stuff so I forgot a lot lol.

Also, I’m gonna put the castle 1717 system in my big savage after I get an Alza center diff for it

Thanks for the help

image.jpg
 
Old Thread: Hello . There have been no replies in this thread for 90 days.
Content in this thread may no longer be relevant.
Perhaps it would be better to start a new thread instead.
Back
Top