Hammer’s impact drill train horn build. 🚂

Hammer Down

I am serious, and don’t call me Shirley! 🙃
Premium Member
Excellence Award
Hospitality Award
Rig of the Month Winner
Build Thread Contributor
Messages
6,808
Reaction score
14,342
Location
The coldest place on earth!! (Minnesota)
Arrma RC's
  1. Infraction
  2. Limitless
  3. Kraton 8S
  4. Kraton 6s
  5. Kraton EXB
  6. Outcast 6s
  7. Outcast 8s
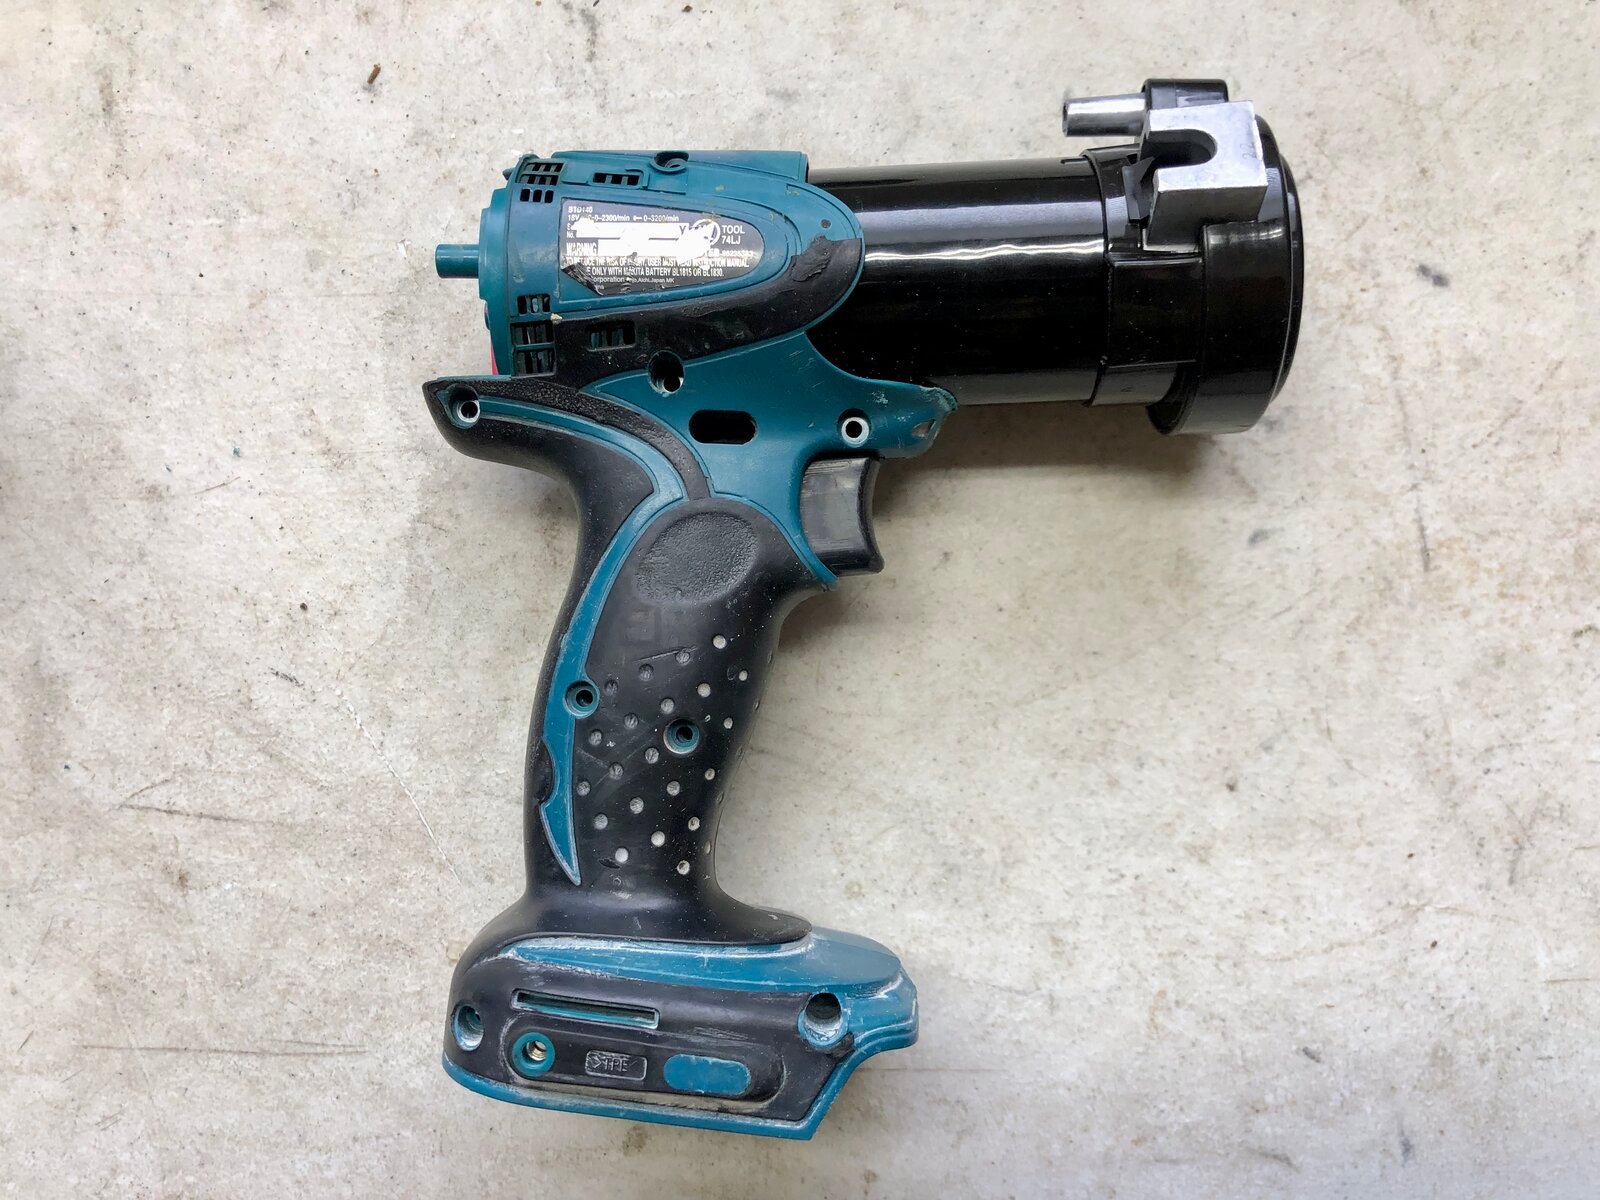
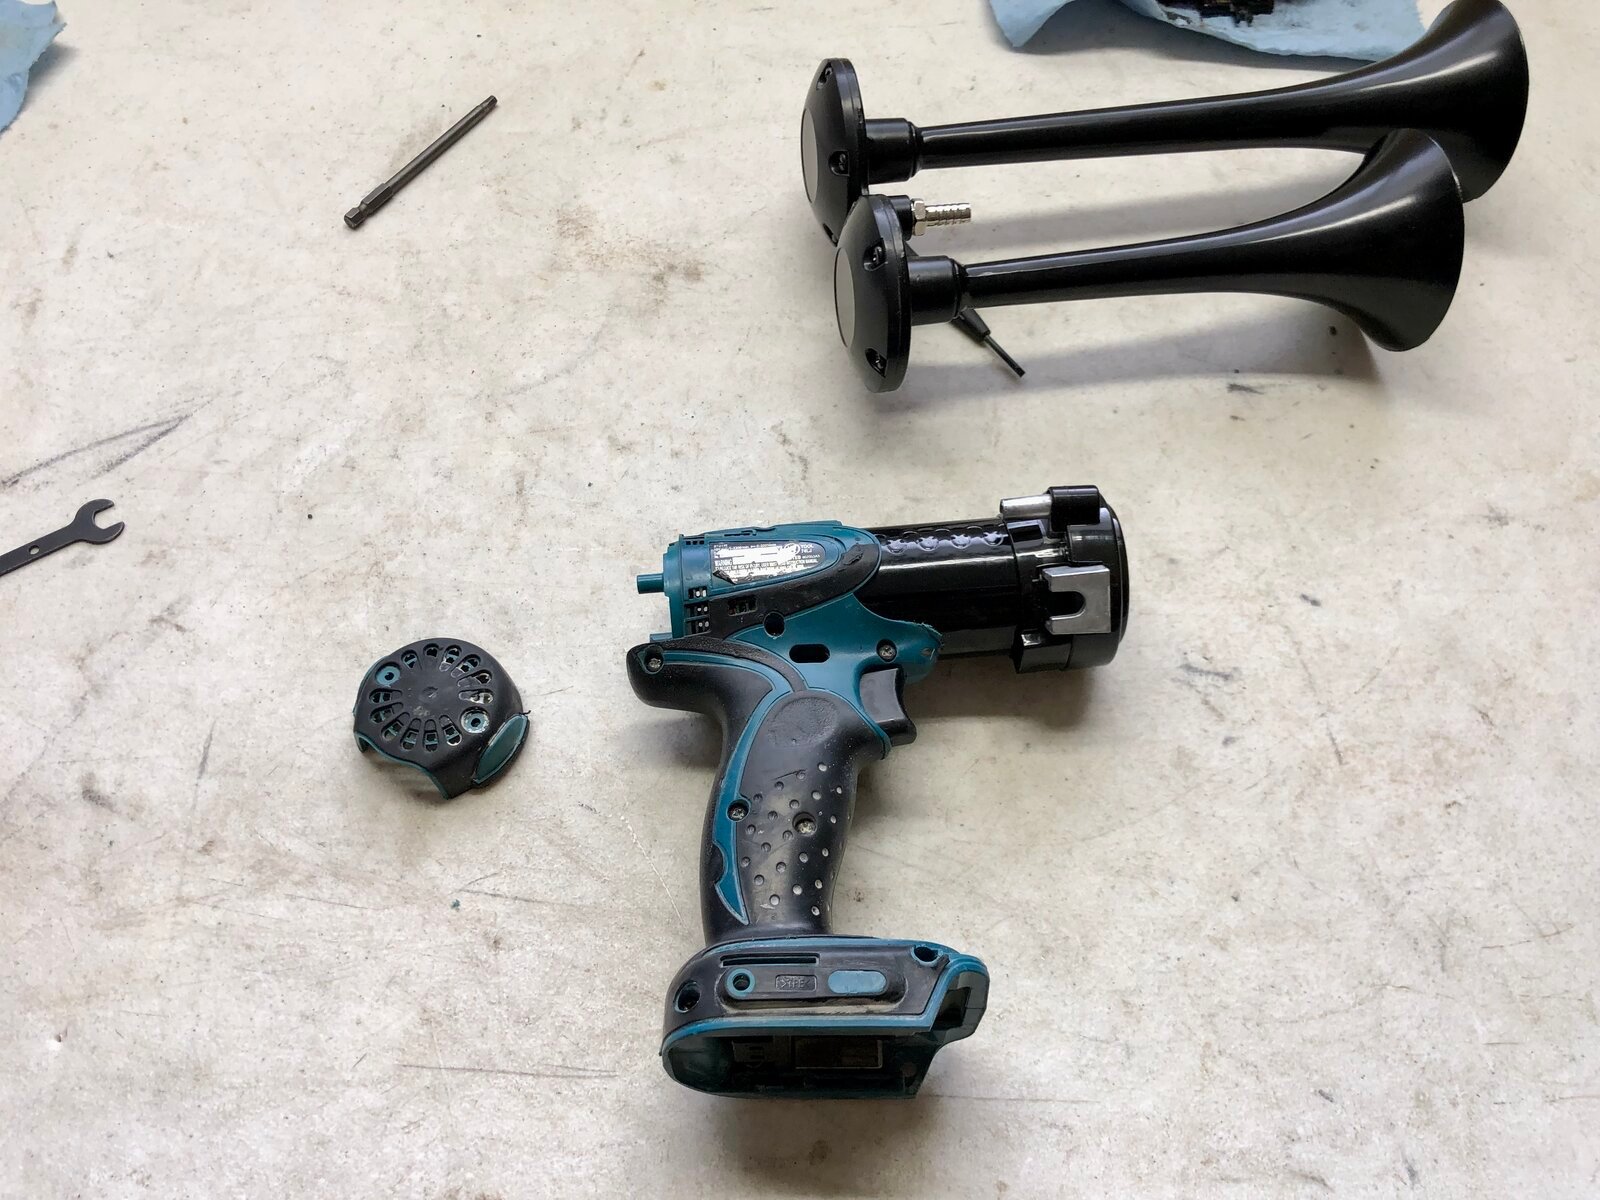
Hammer’s homemade impact train horn build.
This was one of the more fun projects I’ve done in awhile. 😁

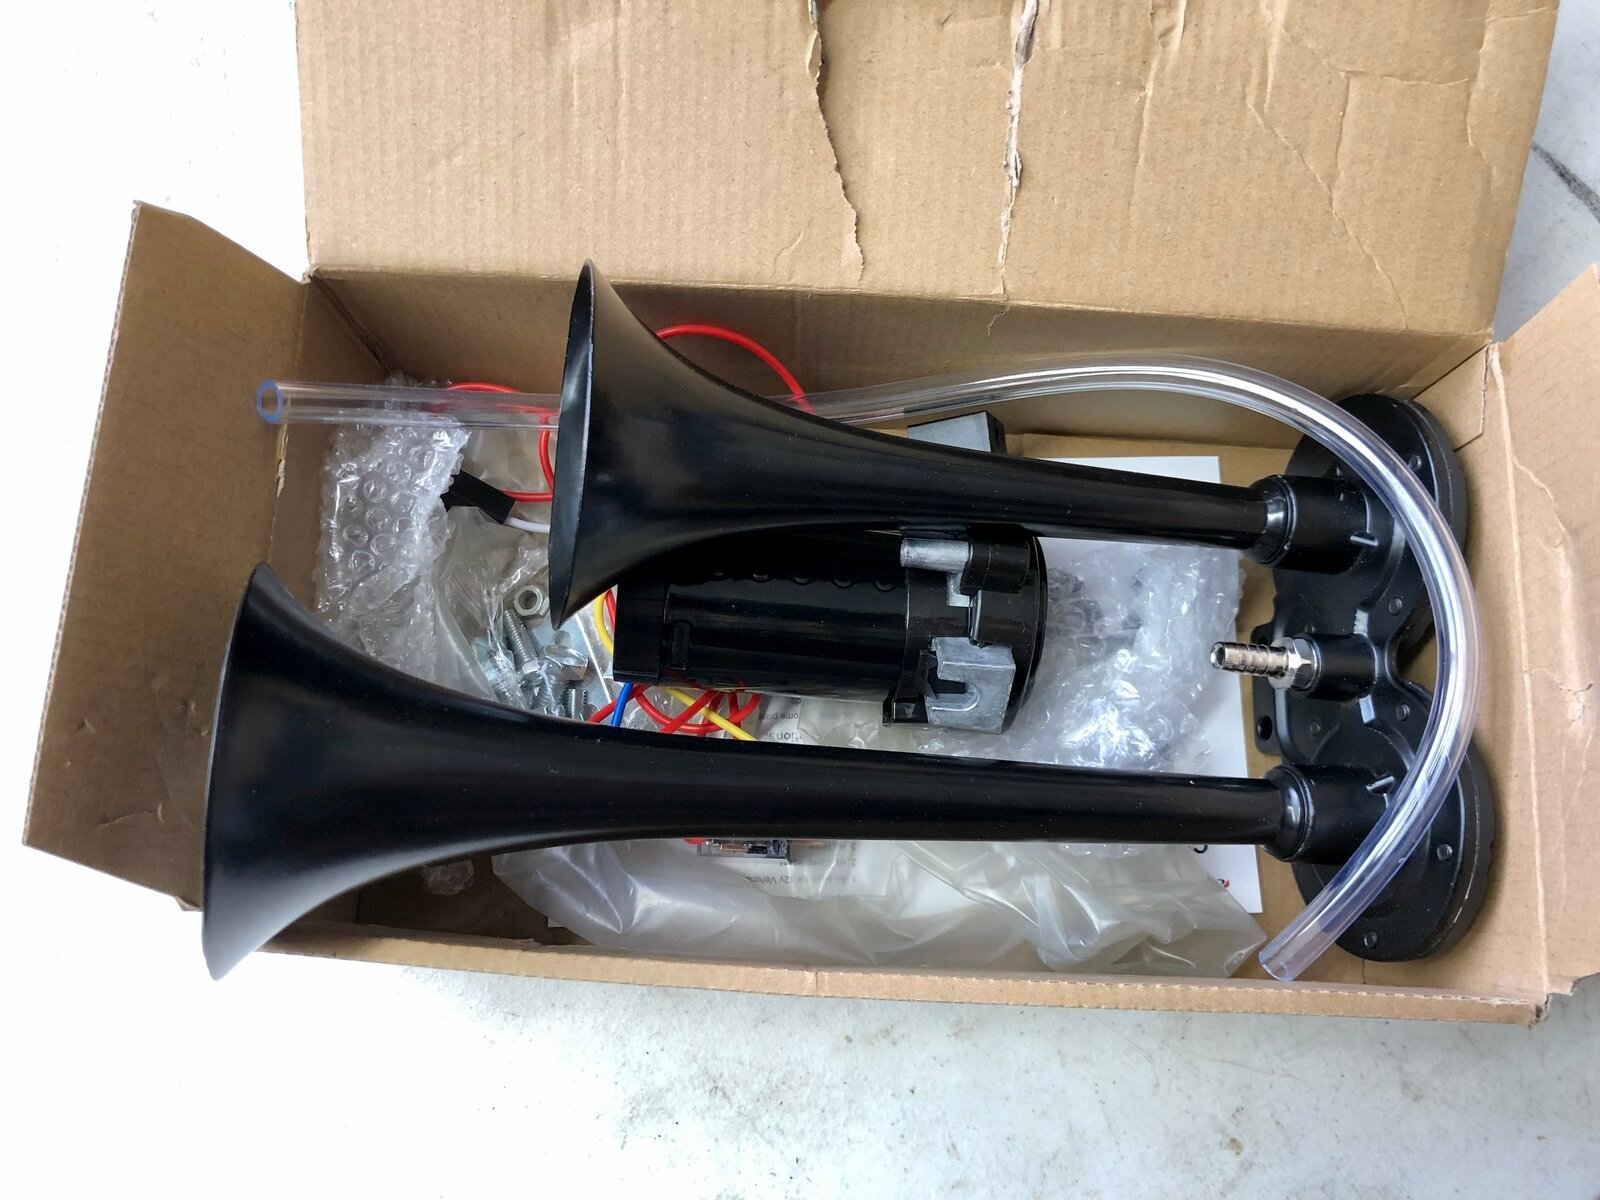
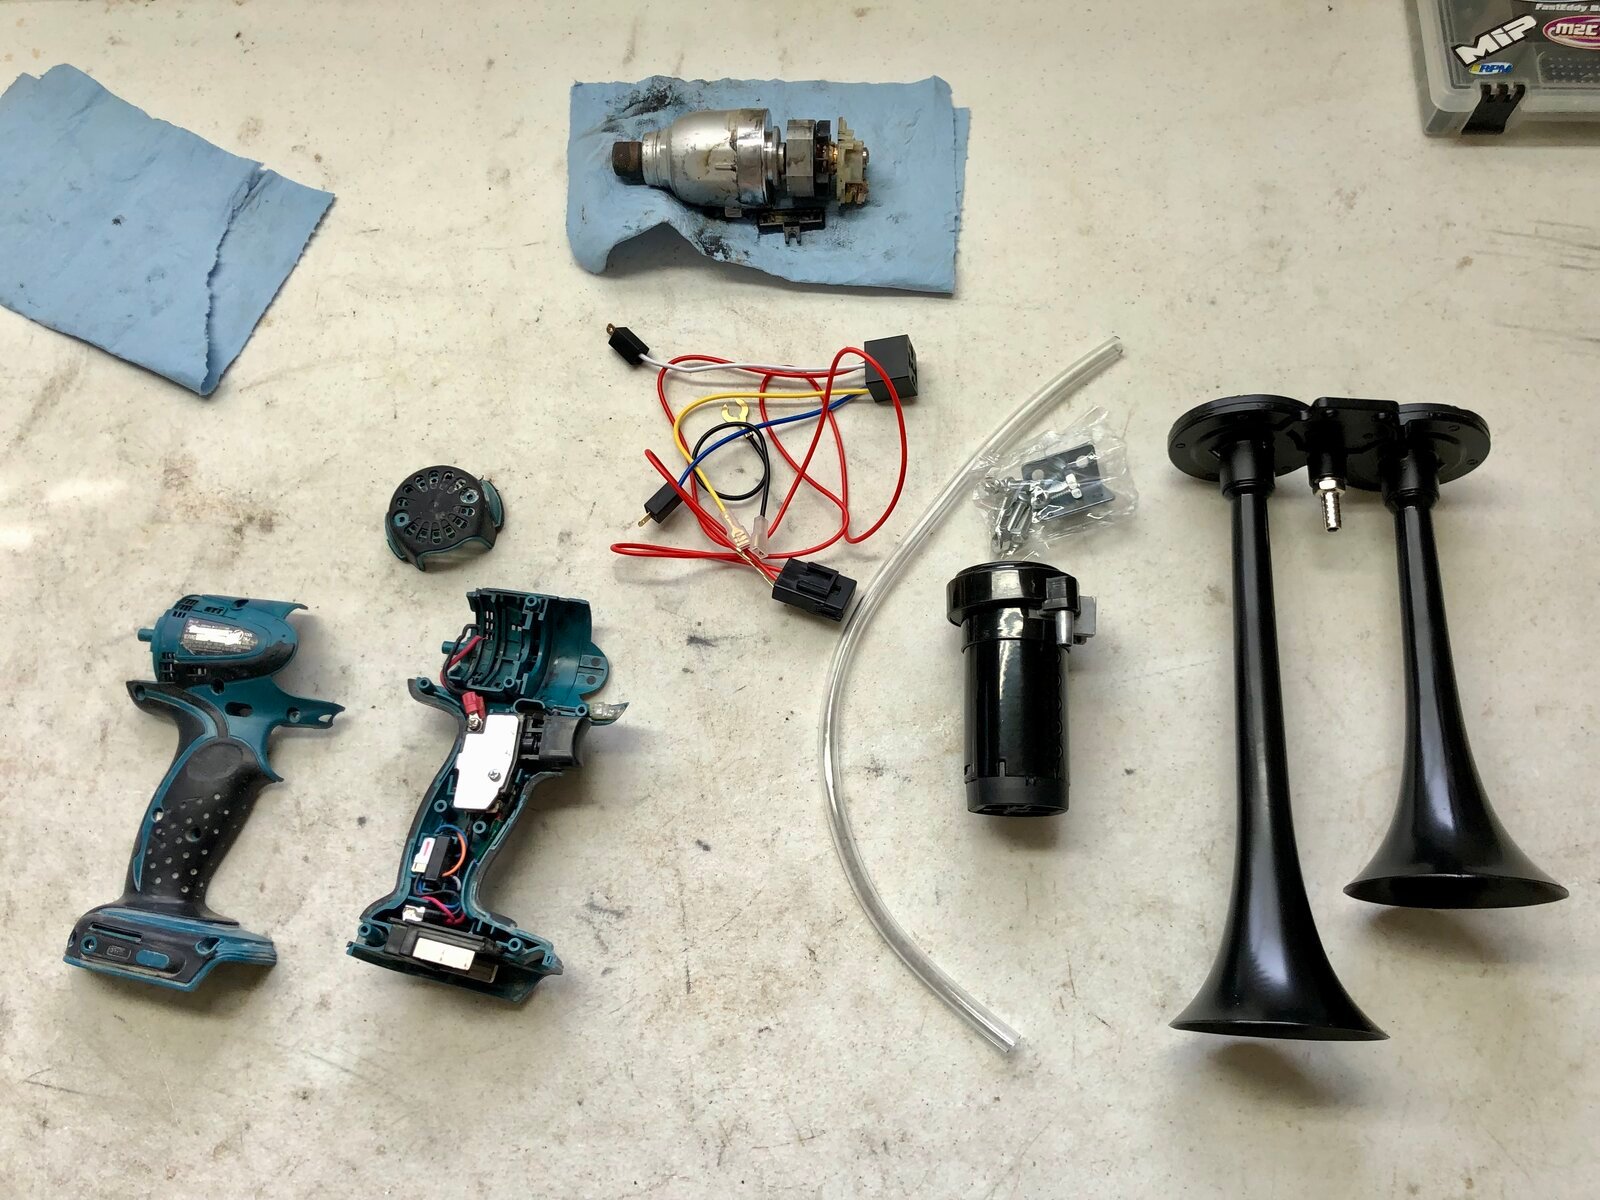
What’s involved you ask..? Well it’s pretty simple and cheap if you have an old cordless impact or drill laying around. Then all you need is this $30 horn and compressor kit found on Amazon. A dremel with some accessories (grinding wheel, sanding drum, rasping bit), a Phillips screwdriver, a soldering iron if you want, heat shrink, hot glue gun and some patience.

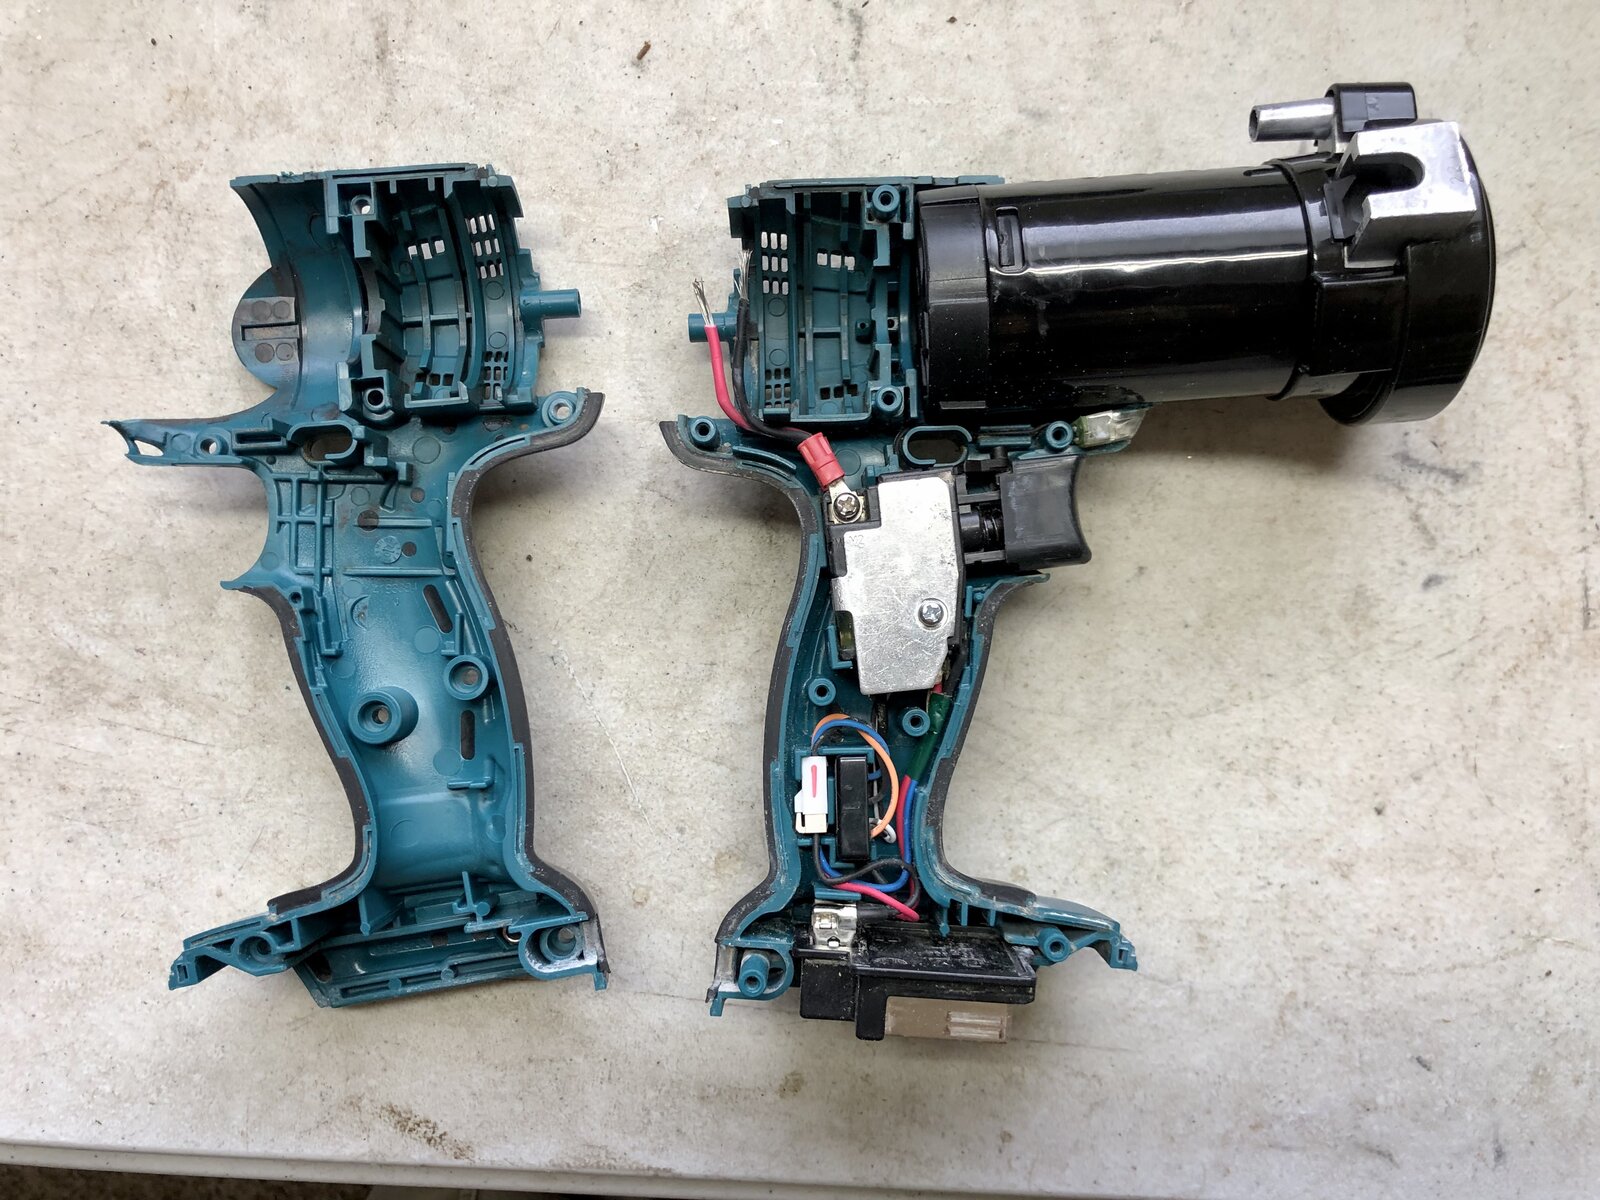
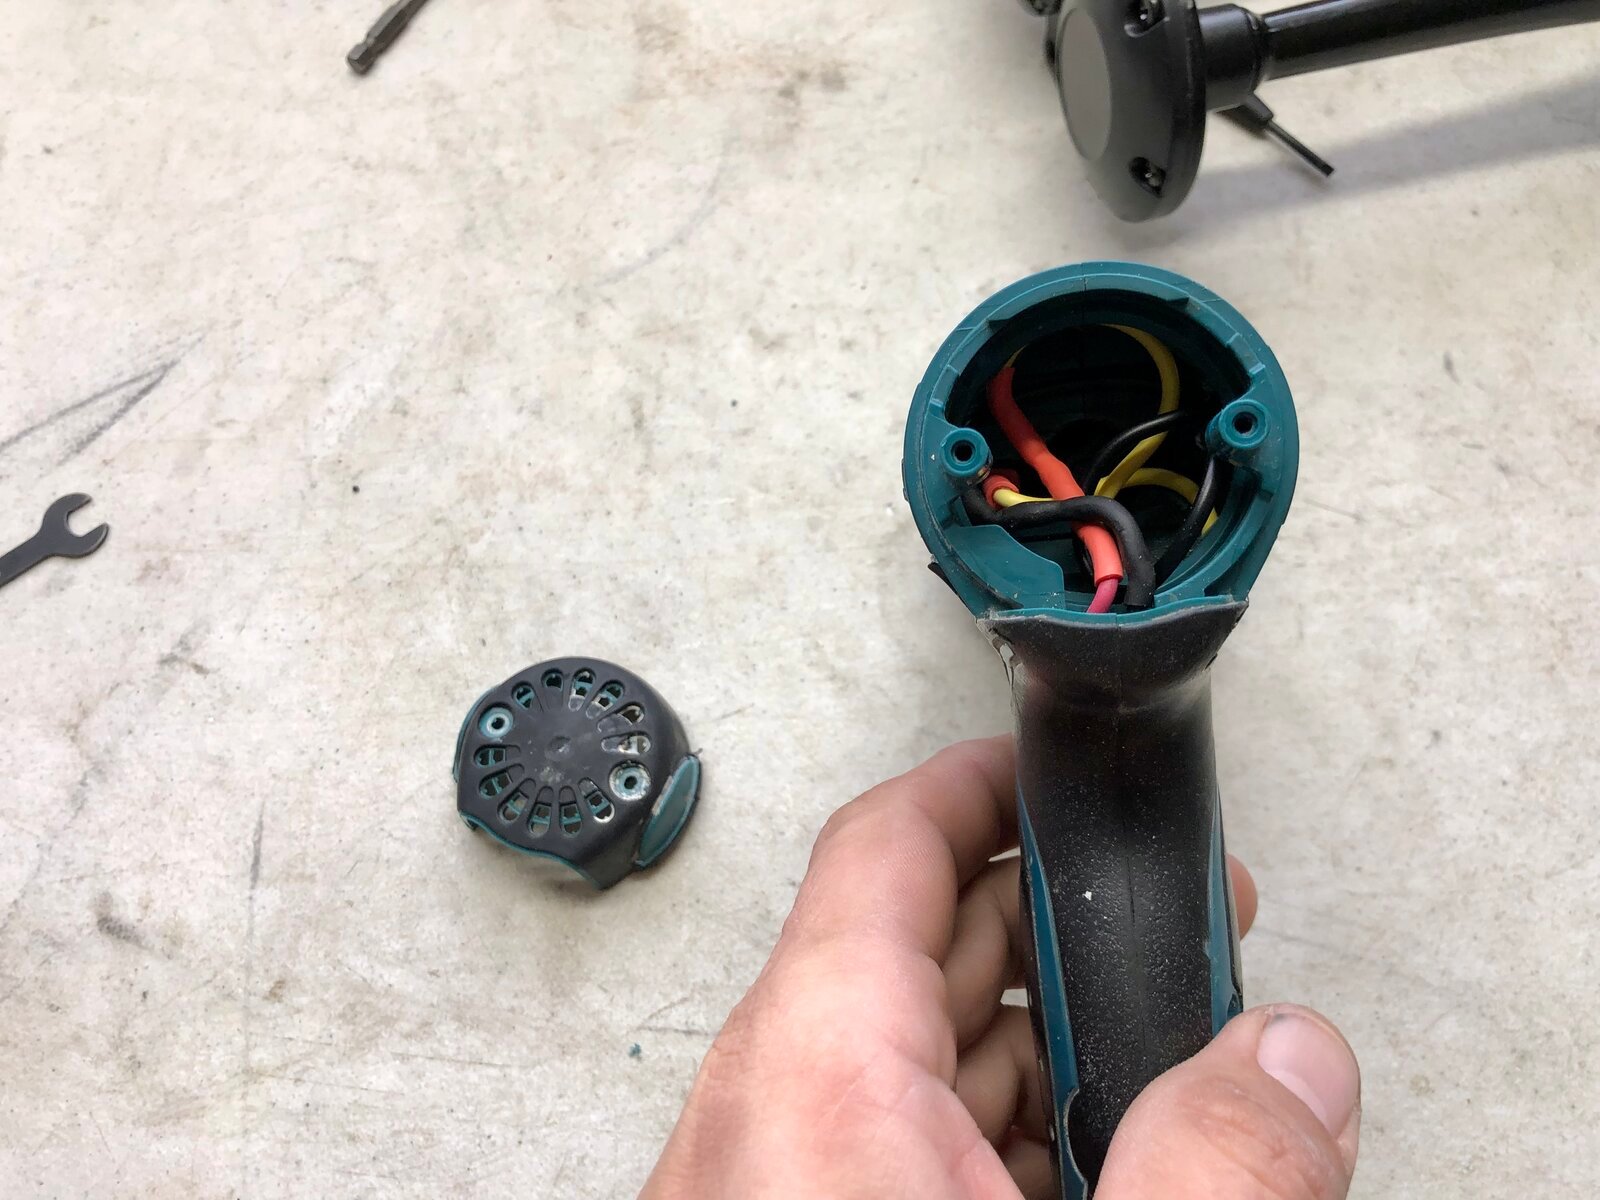
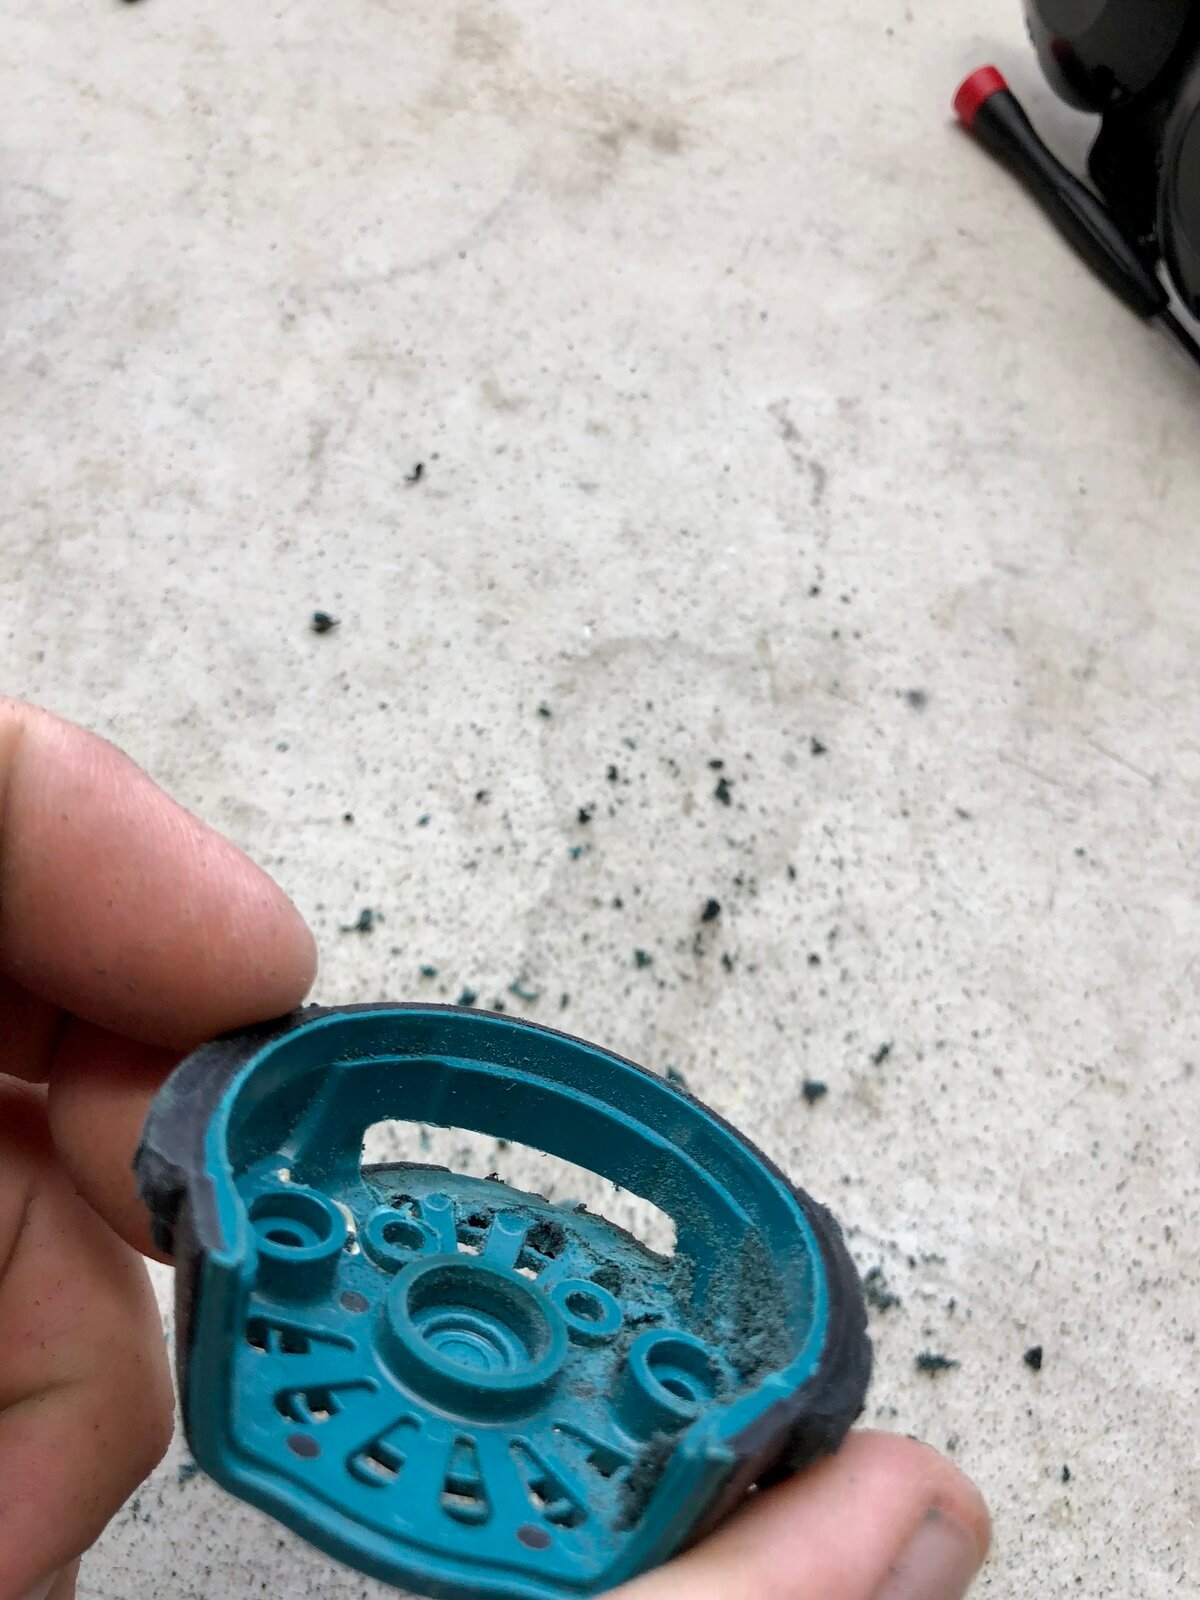
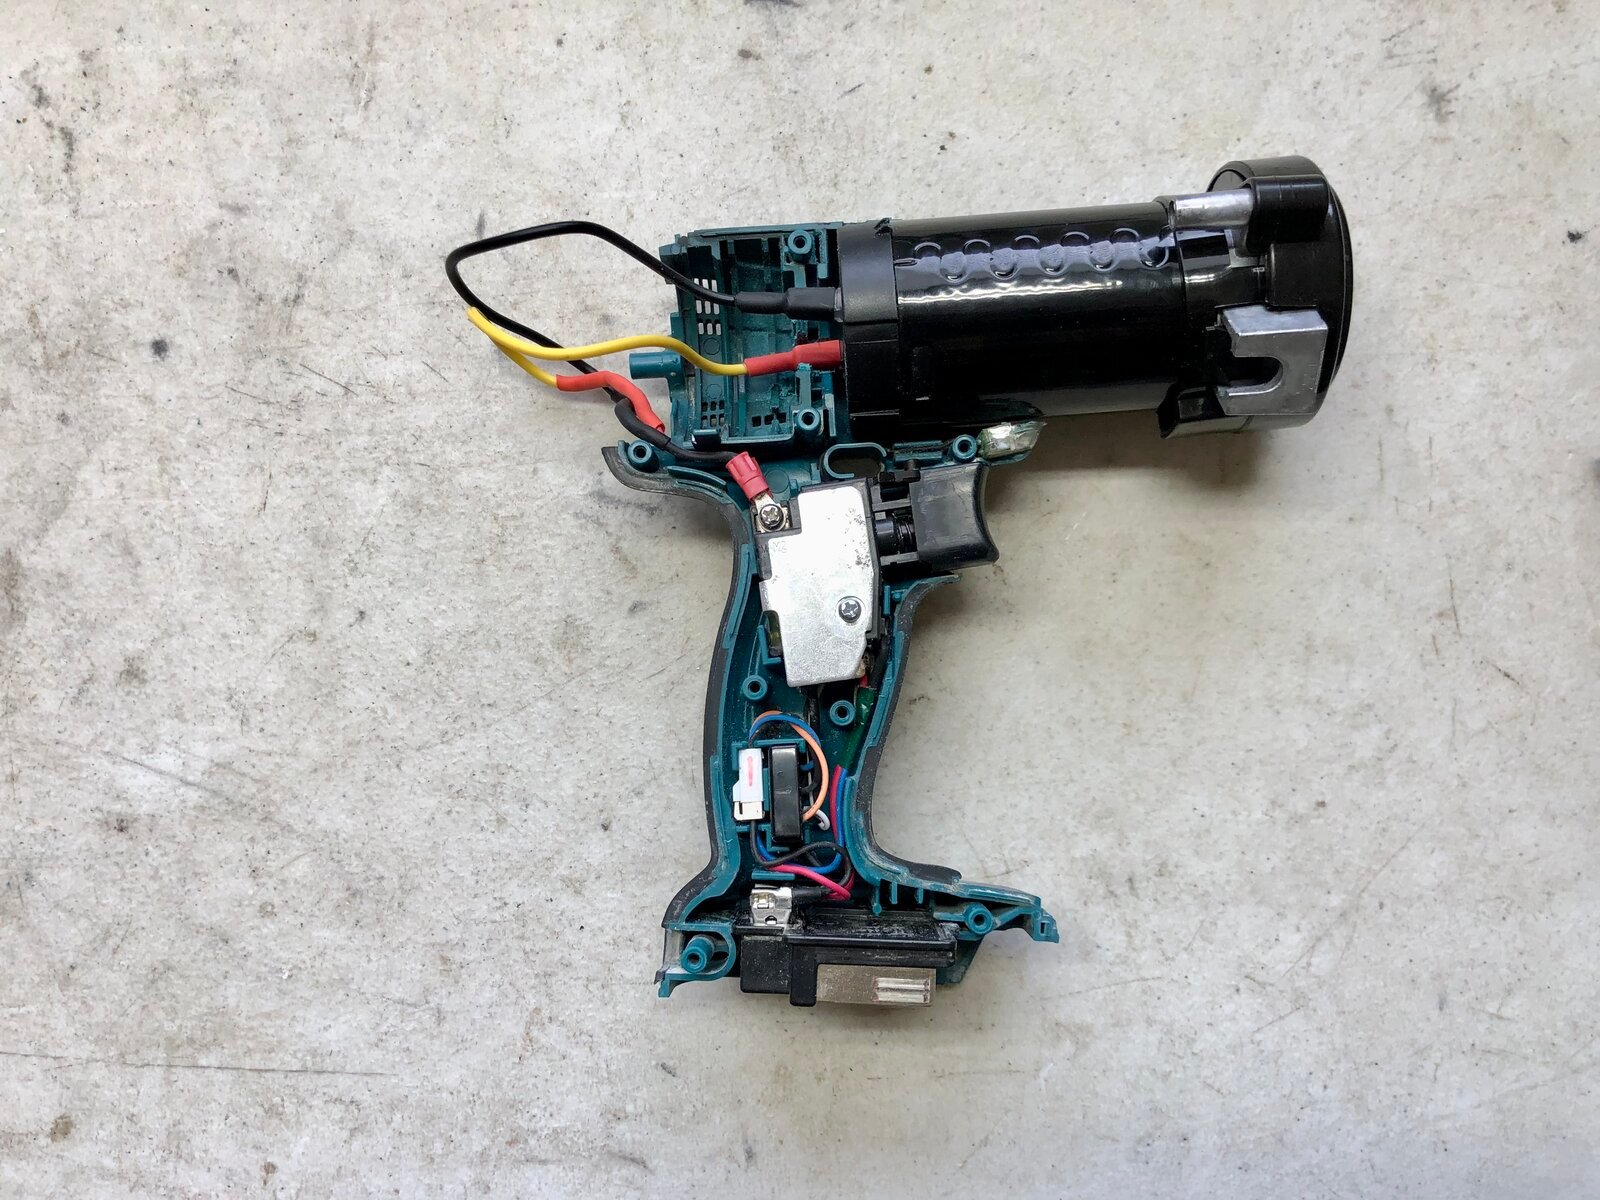
First off start by disassembling the impact/drill. Remove the motor assembly and clip the wires as close to motor as possible. Then clean out dust and dirt if it’s old like mine.
After it’s all clean you can start by test fitting the compressor. Mine fit with almost no effort at all. Just some light dremel work above the trigger was all it needed. Also had to make some clearance for the compressor wires (rasping bit) but overall super easy.

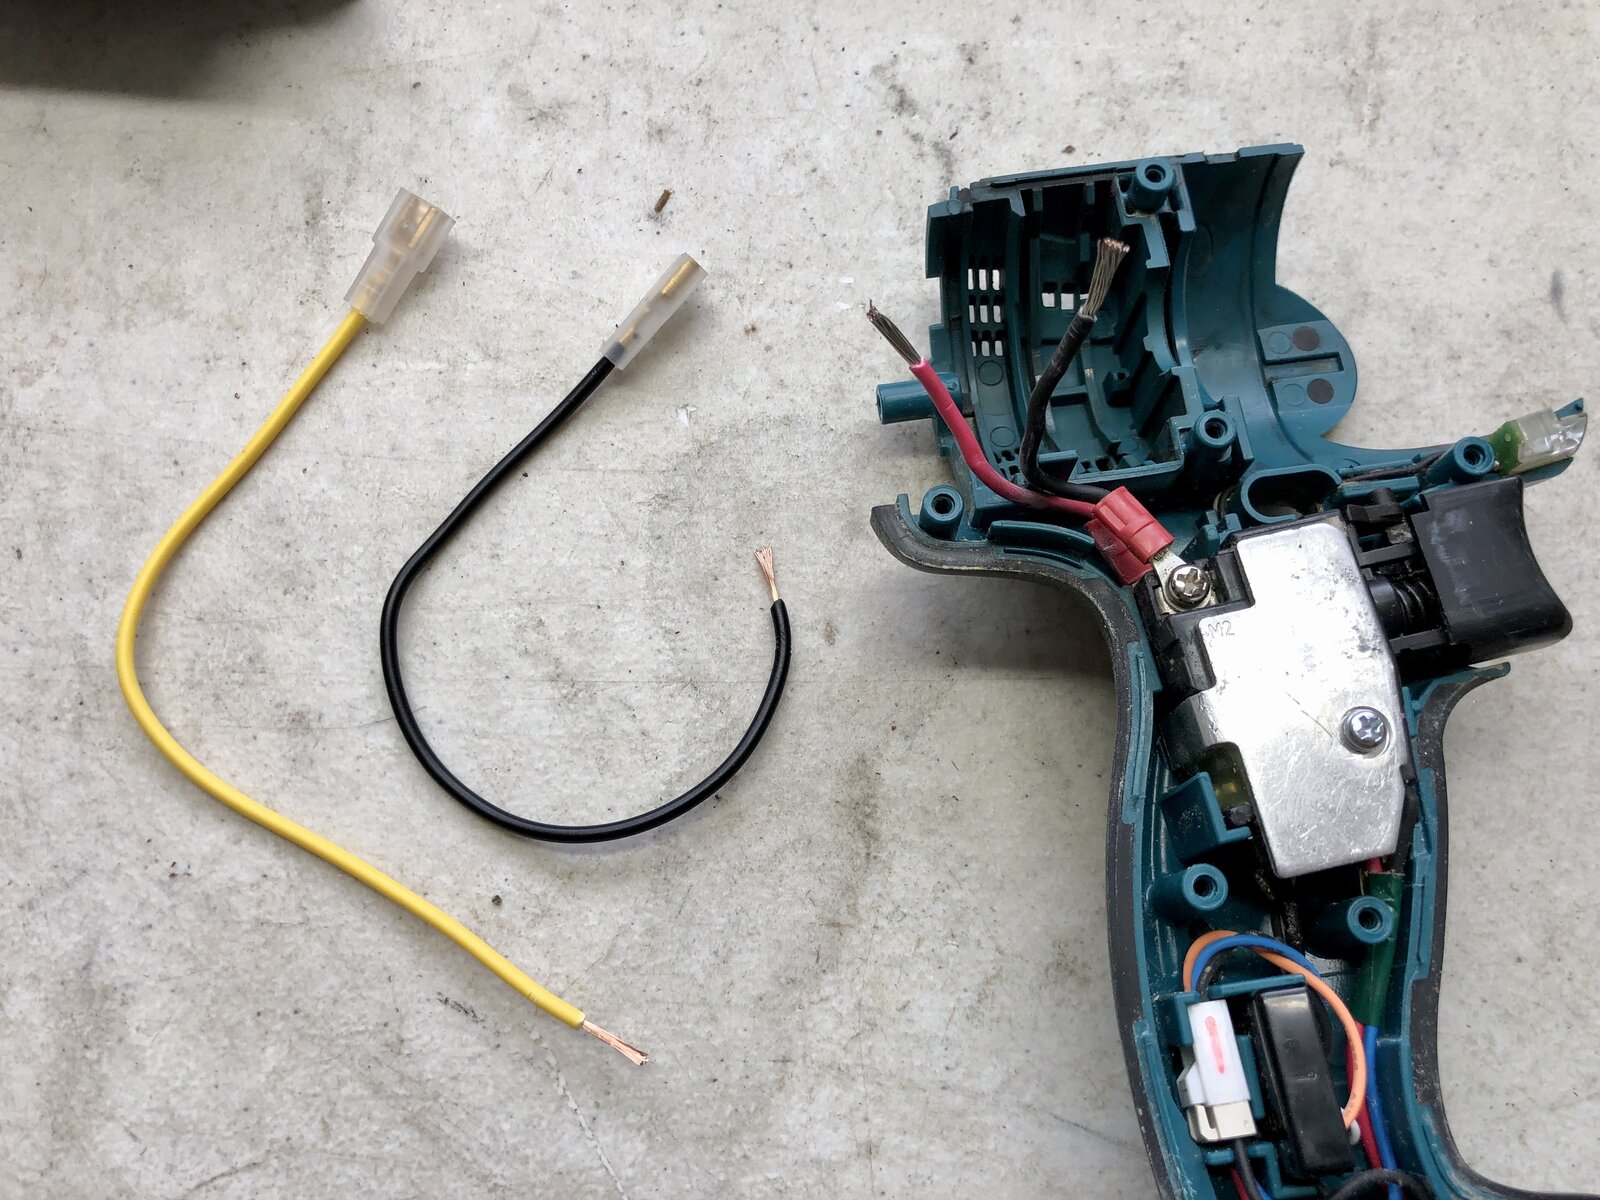
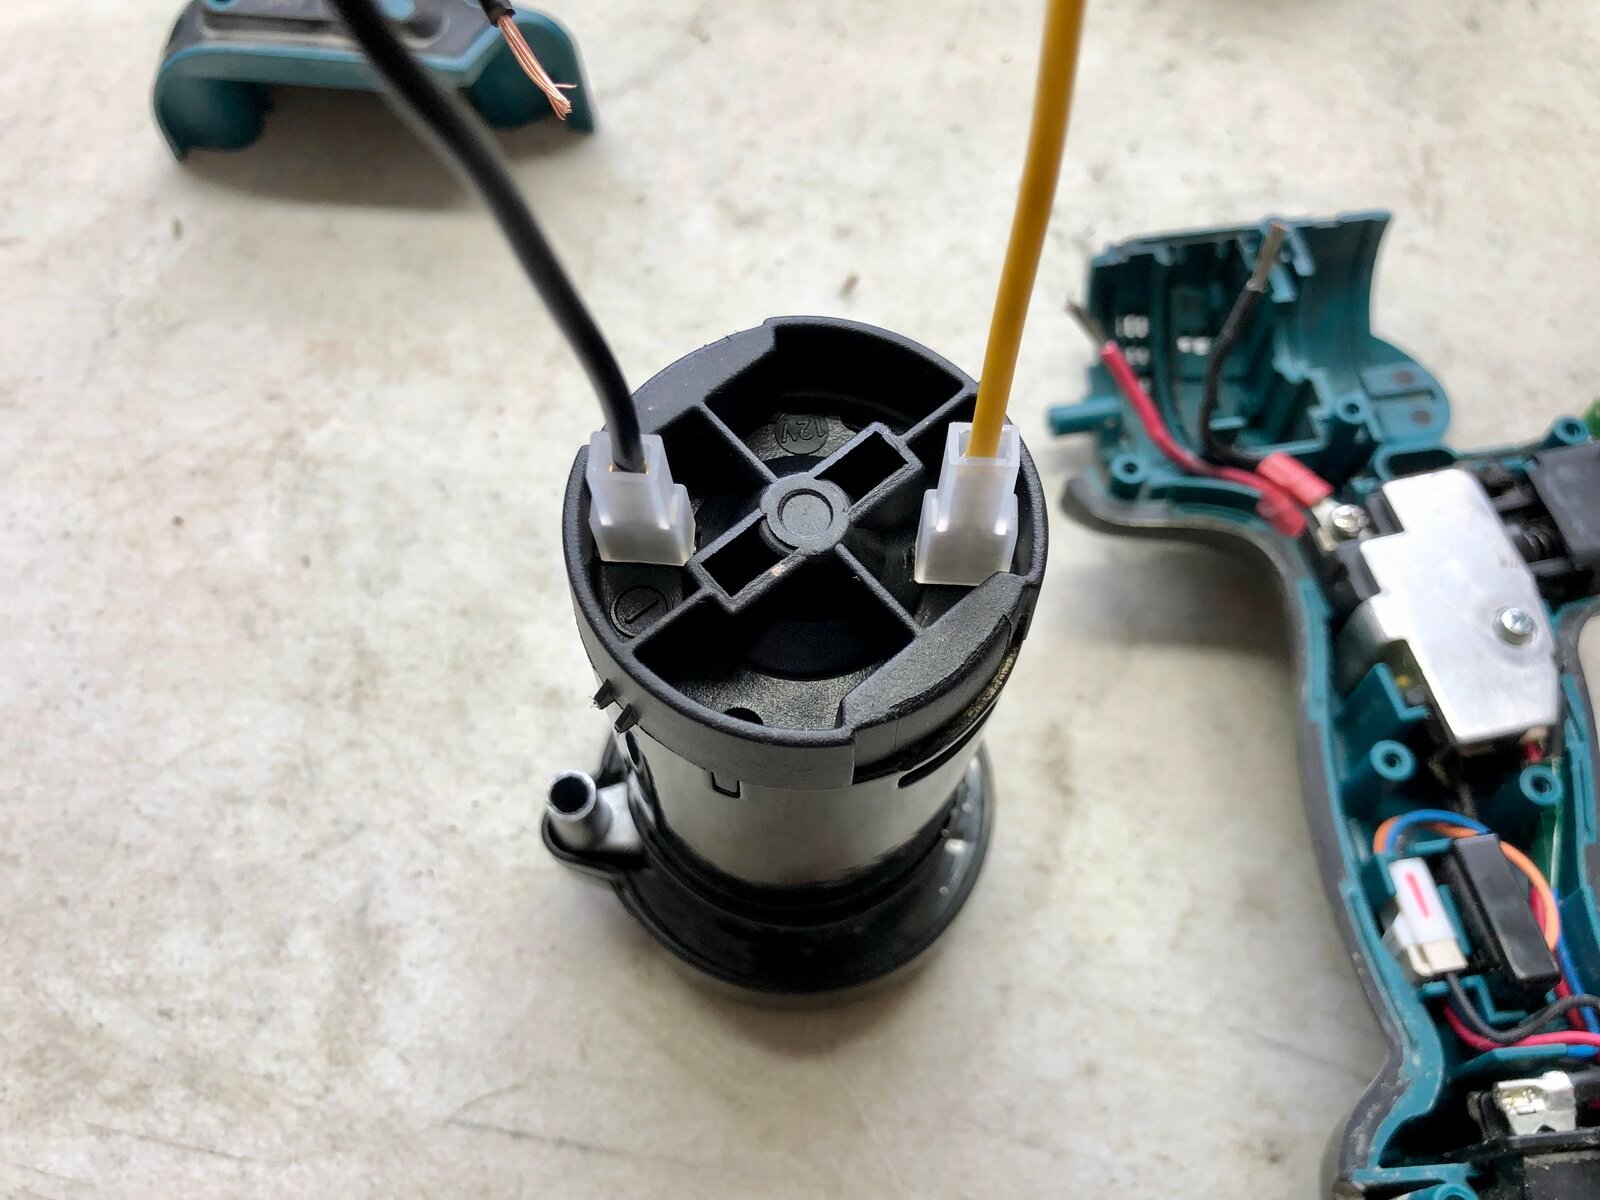
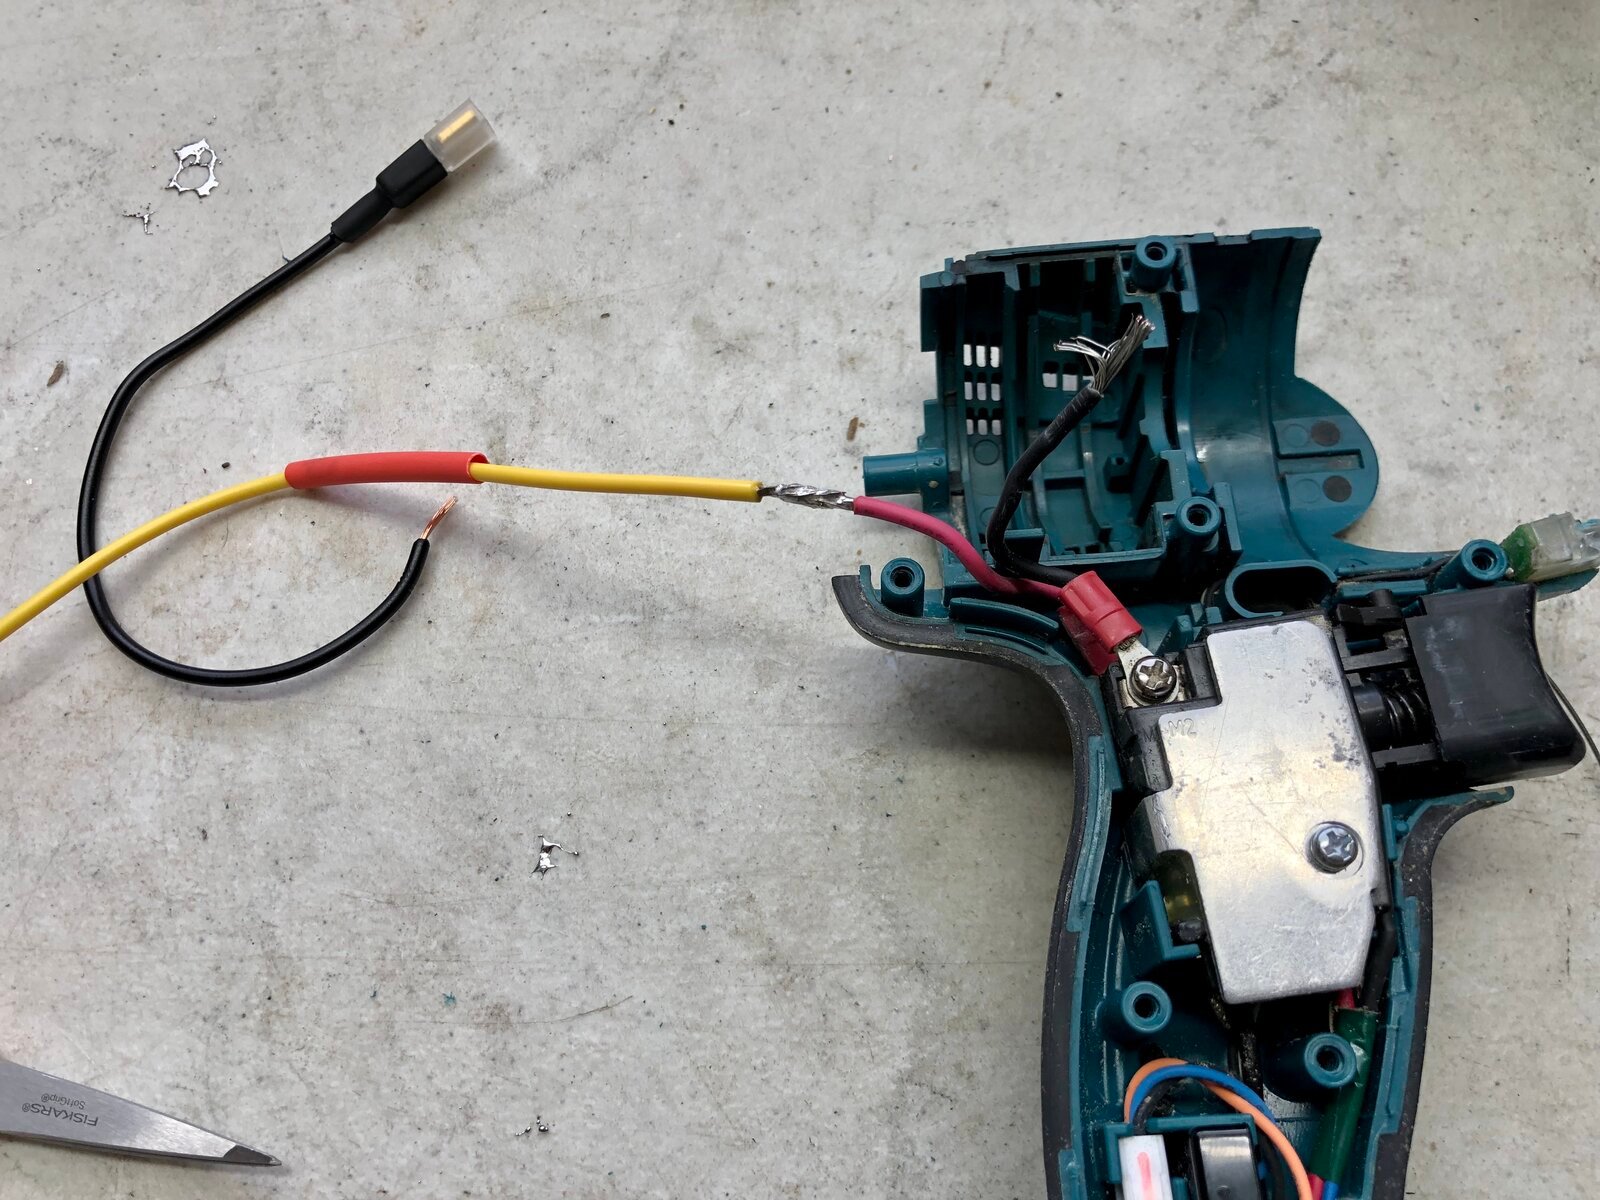
After you fit the compressor in the drill housing, you can connect the wiring from the trigger to the clearly marked +/- posts on the compressor. I chose to splice the existing wiring to the wires that came with the compressor. Mainly because they already had connectors on them.

Once all your wiring and compressor fitting is done you can hot glue, epoxy or whatever you choose to hold the compressor firmly in the drill case. Then reinstall all the screws holding the case together.

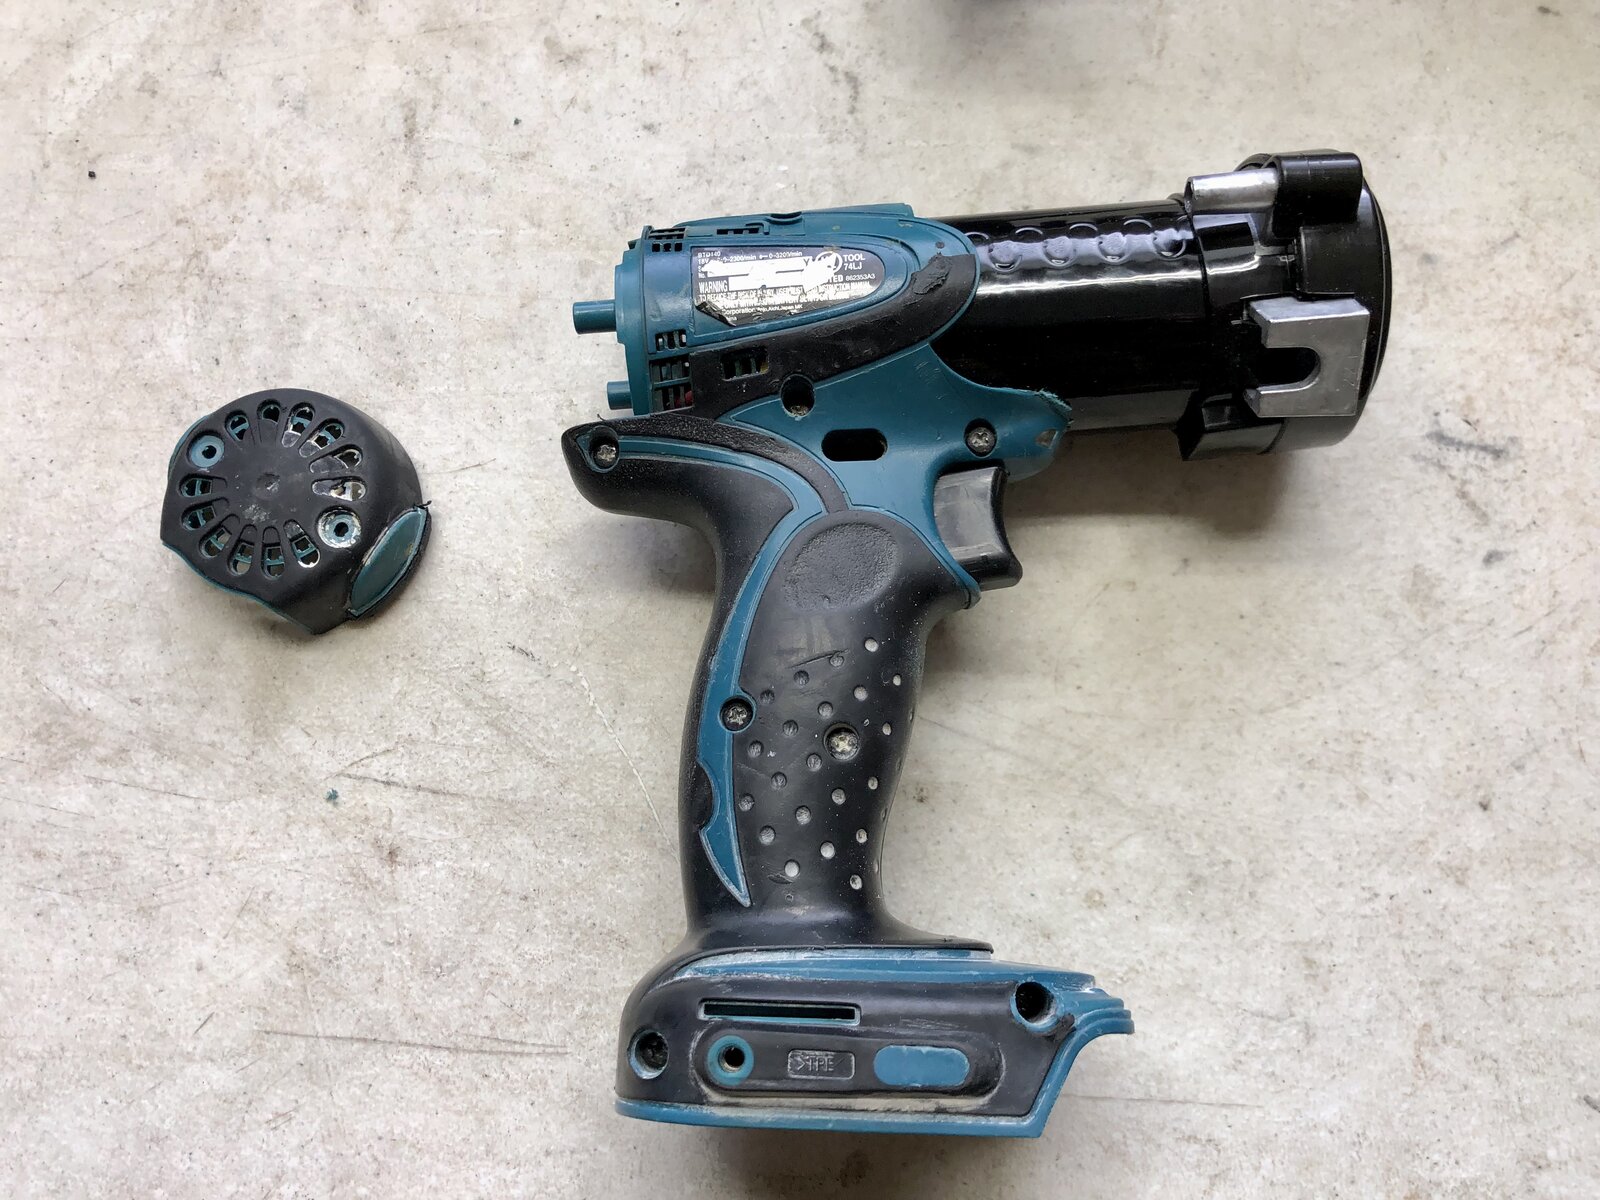
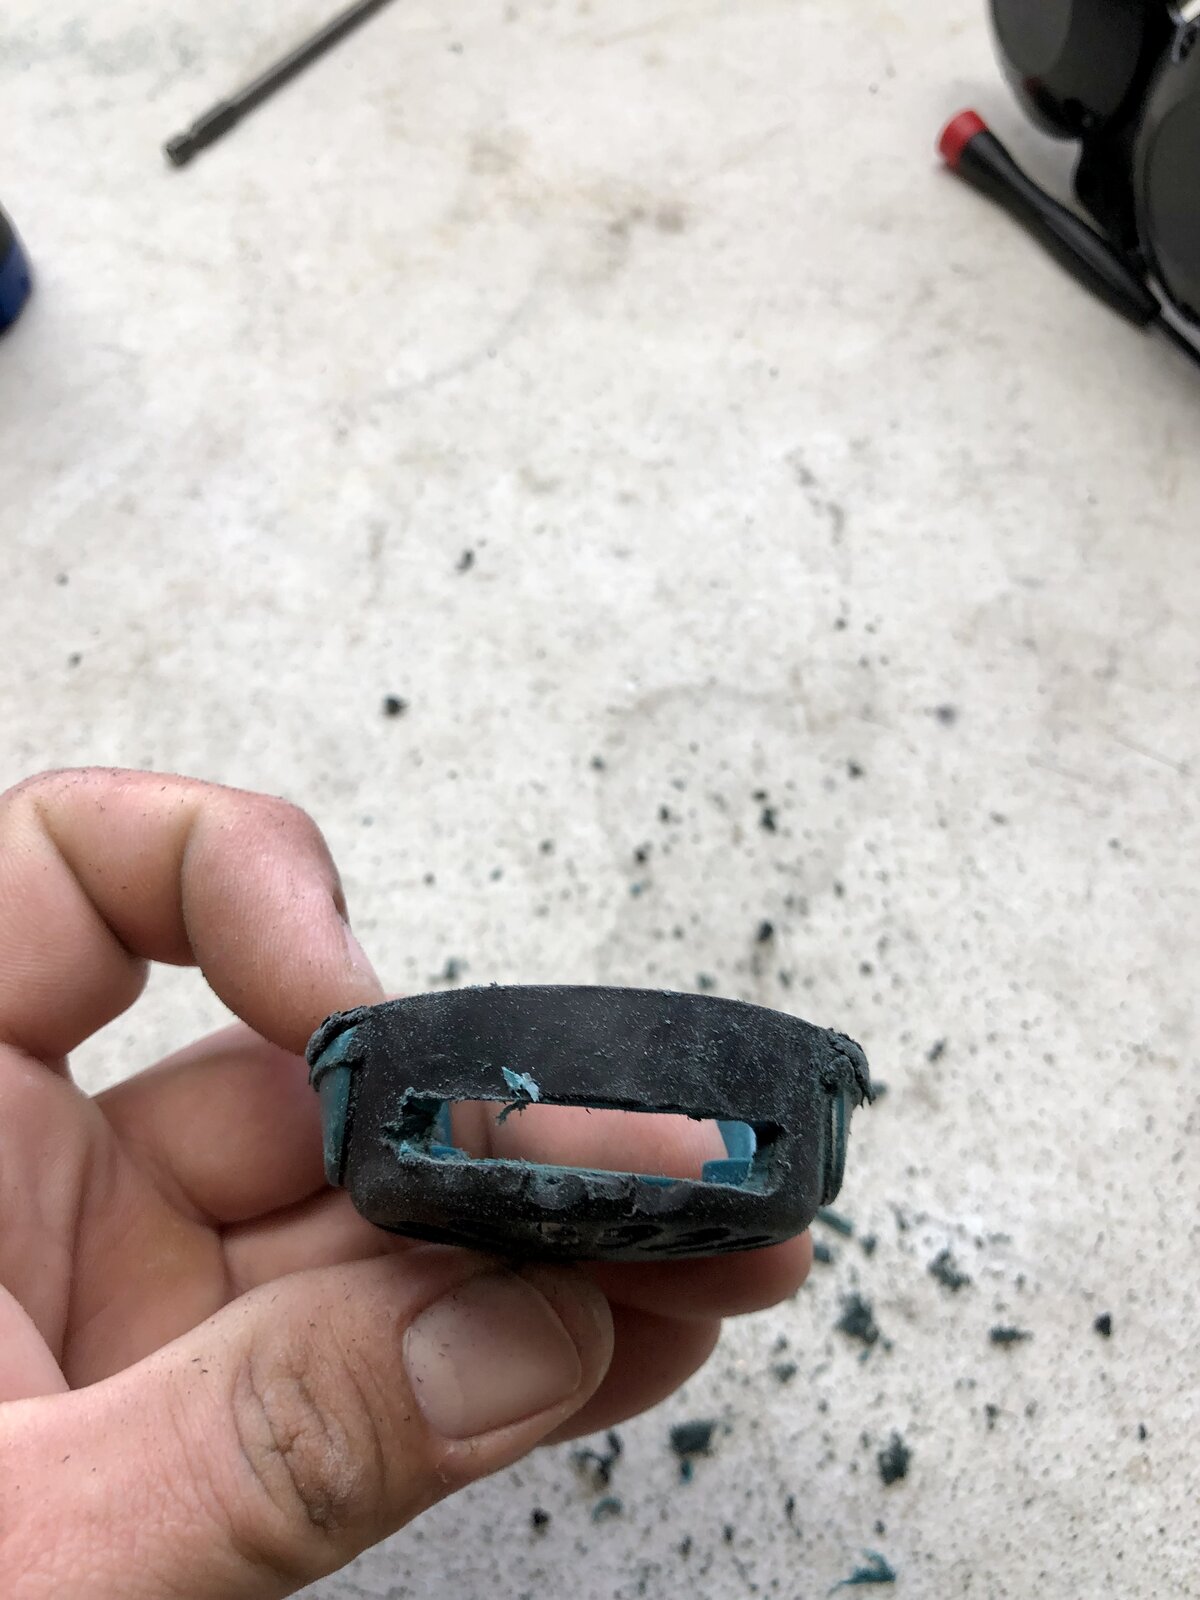
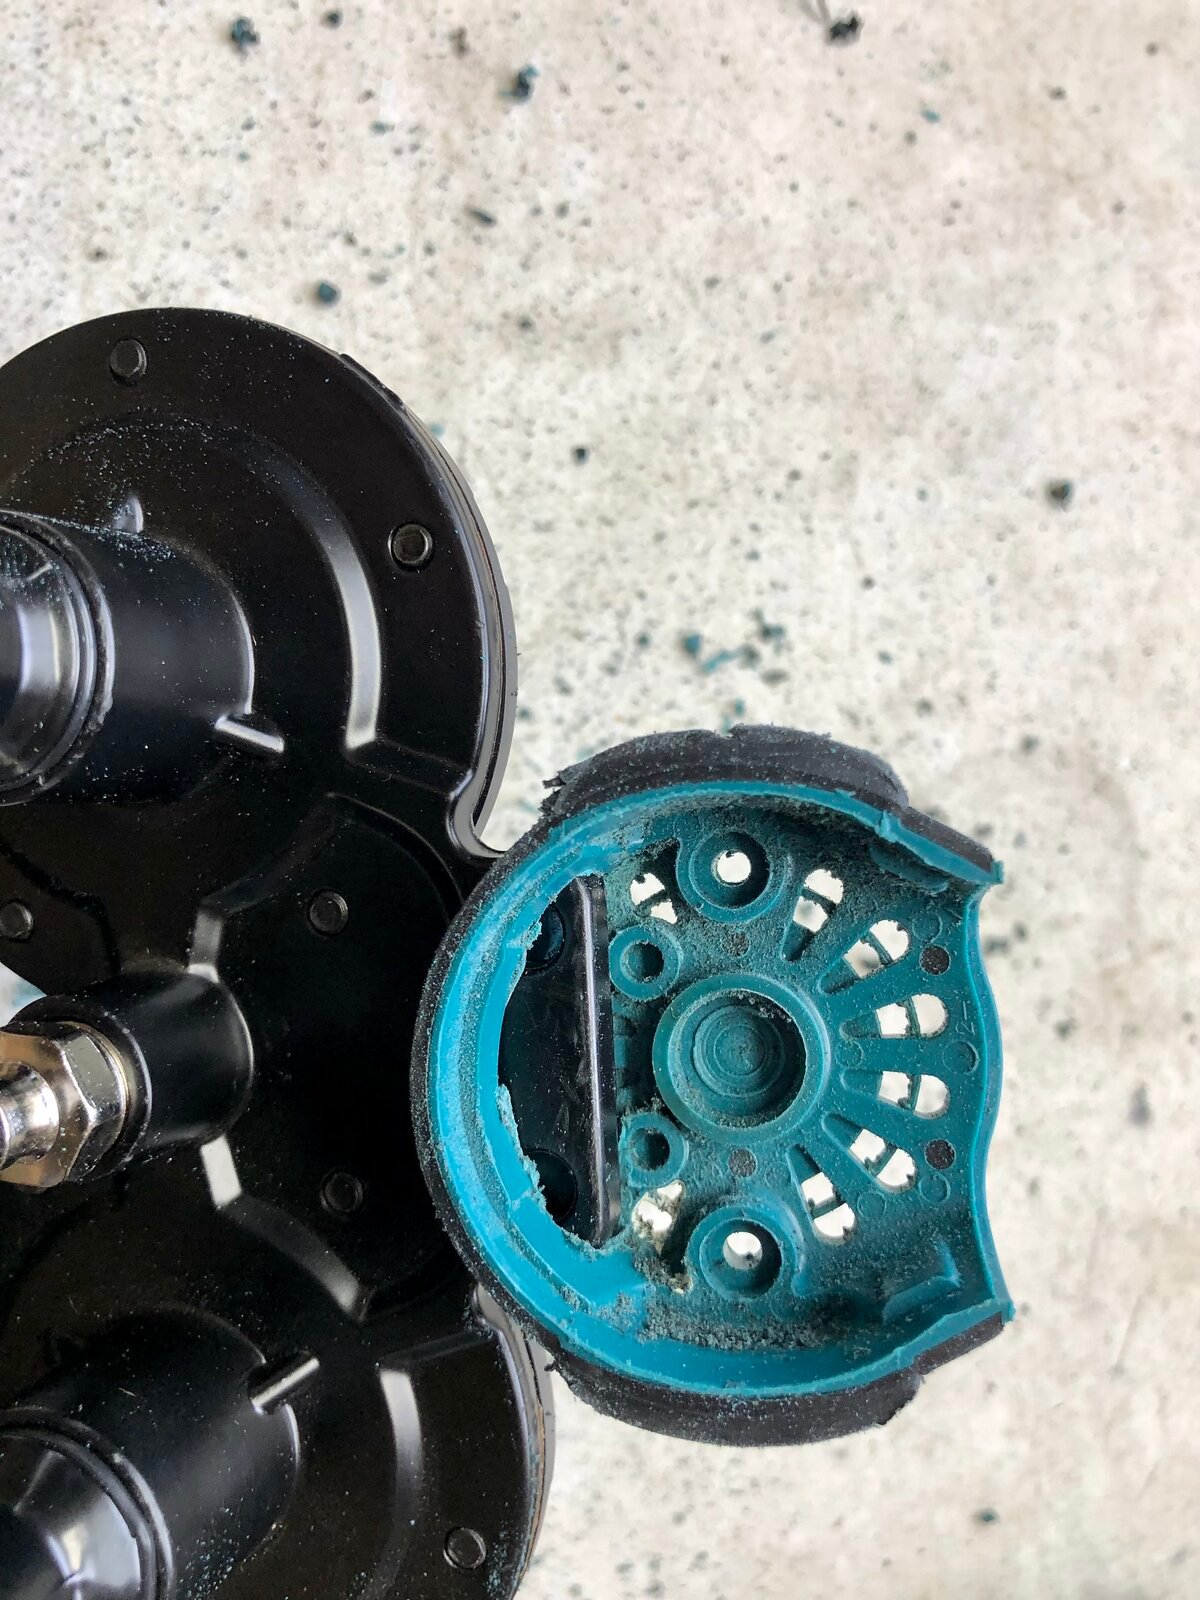
Next is the mounting of the horns. I decided to slot them into the back cover of the case. As that was the cleanest and easiest way. Once the slot was how I wanted I was able to drill some holes in the back cover and bolt them on solid.

Finally put the back cover on, cut the air line to length and install between the compressor and horns. Install a battery and some ear plugs.. and let’er blow! 😈

This was a super fun and easy build. Plus if you have an old impact or drill it’s pretty cheap. 👌

Pics of the installation below. 👇
30974C27-87F2-4899-BC99-853D160DC1E6.jpeg


620A52D1-AFE0-4C86-B57C-8B5D91197483.jpeg


5DBA404F-BB8E-4898-BFE9-0848649D3A19.jpeg


ED611DDA-B5CD-4682-BB9E-438C92BFB2A1.jpeg


F6CD65CD-DD8B-4E2B-A2A7-CAC6E31891DE.jpeg


7A26A777-DF20-45F6-A44D-C5CD81B69358.jpeg


DE5A55F0-9738-4975-A807-1DA45A364211.jpeg


851FFB5E-E740-4313-869E-8E38C24C99FC.jpeg


25BE399D-B54E-4699-B5D4-ACC390556A68.jpeg


B3A9122D-6543-4826-ACA7-128752B3EBE1.jpeg


7CB7CB0E-37C3-4CB8-8839-D39290059A98.jpeg


DC8A8220-F769-48A5-B956-F105FCDEB692.jpeg


2CADA18B-9DD7-4B85-B4A0-89A169247644.jpeg


DA9E22BB-0456-43C9-B966-704480347582.jpeg


92BA22EF-1FF2-4133-9770-98FAAB56AE72.jpeg


F1A3AA31-AD00-46A4-9FD1-C7A598A52013.jpeg

739C915C-BC92-46DE-BAA4-11990FA044BE.jpeg
97E86E72-4D2E-45DD-BDF8-D92B5F9A74F8.jpeg
EE76A497-D407-4CE9-8EFD-A8E3F93EB1E5.jpeg
05ED2C8A-617D-474C-9E27-B11D0587BF0A.jpeg
334BB4D0-E1EB-4D84-9017-219897476E47.jpeg
DF426BB5-A5BE-4DB8-922D-59DF3DB39DB6.jpeg
63153031-F0D7-45D3-A8F0-2D5146FDC016.jpeg
9875BB1A-7402-4390-9892-720B0584B2B1.jpeg
D92FBE1C-B608-4270-A98F-075F0CCBD2CD.jpeg
62A9D933-0503-4D53-BB8A-0DAA94C01880.jpeg
C8931FEA-0DDB-4A6C-8AE0-7CE05F81FAB5.jpeg
984D47D9-7A99-4F86-A331-BEAEE5273DFF.jpeg
34A1C2B7-D031-4788-A092-3BE41AB4CD8A.jpeg
8703BF0C-ACB6-4523-BD5A-3D7063434A24.jpeg
00C8A503-3622-4BA3-A857-9D0D4DF12F91.jpeg

3AA34F1C-65D7-49E1-835F-EA9DD04B174A.jpeg
5D82C84A-25C6-4B15-A5F0-5055BAD0C314.jpeg
8A59345E-87F1-49B5-B79E-869147D738C1.jpeg
7460E12E-94EB-4555-A530-9AF615C69A06.jpeg
85DB625C-0120-4791-8B61-56B463B15054.jpeg
34F46E98-5799-4483-BE19-86A6009F5DE7.jpeg

The led light still works too! 😎
 
Last edited:

Hammer Down

I am serious, and don’t call me Shirley! 🙃
Premium Member
Excellence Award
Hospitality Award
Rig of the Month Winner
Build Thread Contributor
Messages
6,808
Reaction score
14,342
Location
The coldest place on earth!! (Minnesota)
Arrma RC's
  1. Infraction
  2. Limitless
  3. Kraton 8S
  4. Kraton 6s
  5. Kraton EXB
  6. Outcast 6s
  7. Outcast 8s

Velodromed

One to turn, two to burn.
Premium Member
Build Thread Contributor
Messages
7,398
Reaction score
13,041
Location
San Antonio, TX
Arrma RC's
  1. BigRock 4x4
  2. Granite
  3. Kraton 6s
  4. Kraton 4s
  5. Notorious
  6. Outcast 4s
  7. Vorteks
  8. Voltage
  9. Infraction 4x4
Hammer’s homemade impact train horn build.
This was one of the more fun projects I’ve done in awhile. 😁

What’s involved you ask..? Well it’s pretty simple and cheap if you have an old cordless impact or drill laying around. Then all you need is this $30 horn and compressor kit found on Amazon. A dremel with some accessories (grinding wheel, sanding drum, rasping bit), a Phillips screwdriver, a soldering iron if you want, heat shrink, hot glue gun and some patience.

First off start by disassembling the impact/drill. Remove the motor assembly and clip the wires as close to motor as possible. Then clean out dust and dirt if it’s old like mine.
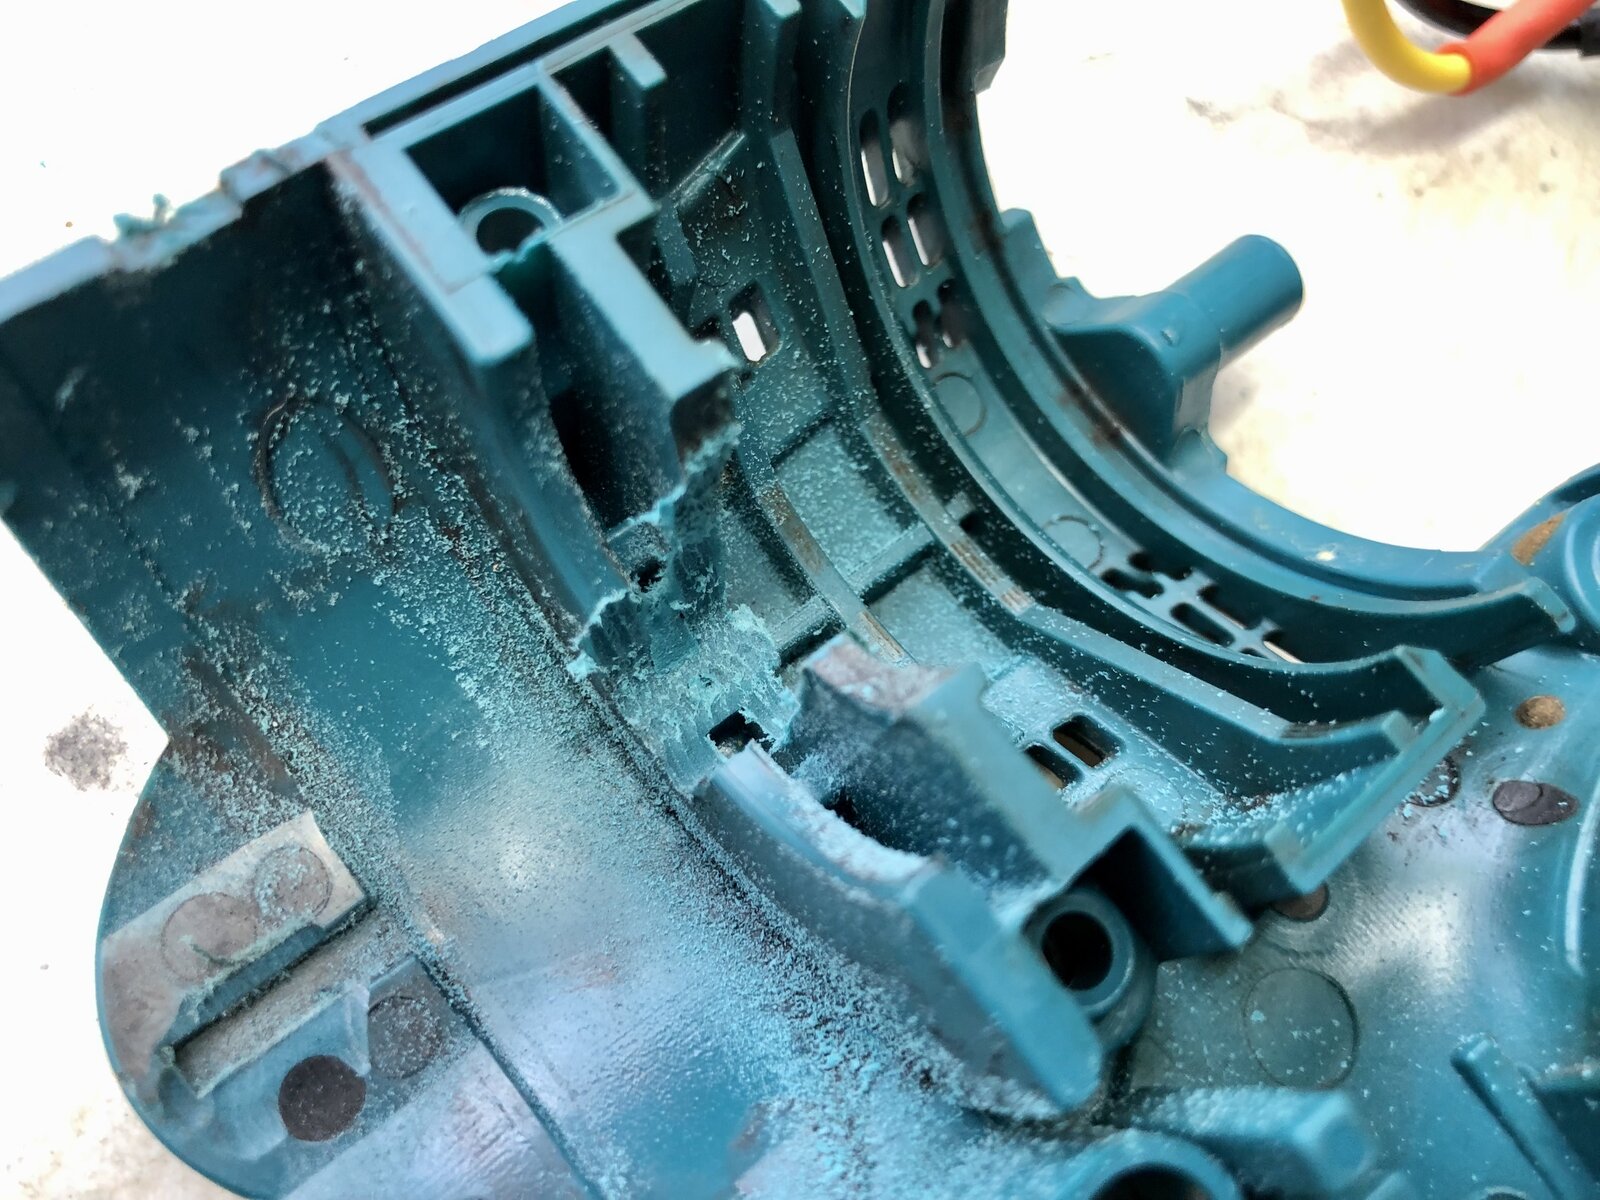
After it’s all clean you can start by test fitting the compressor. Mine fit with almost no effort at all. Just some light dremel work above the trigger was all it needed. Also had to make some clearance for the compressor wires (rasping bit) but overall super easy.

After you fit the compressor in the drill housing, you can connect the wiring from the trigger to the clearly marked +/- posts on the compressor. I chose to splice the existing wiring to the wires that came with the compressor. Mainly because they already had connectors on them.

Once all your wiring and compressor fitting is done you can hot glue, epoxy or whatever you choose to hold the compressor firmly in the drill case. Then reinstall all the screws holding the case together.

Next is the mounting of the horns. I decided to slot them into the back cover of the case. As that was the cleanest and easiest way. Once the slot was how I wanted I was able to drill some holes in the back cover and bolt them on solid.

Finally put the back cover on, cut the air line to length and install between the compressor and horns. Install a battery and some ear plugs.. and let’er blow! 😈

This was a super fun and easy build. Plus if you have an old impact or drill it’s pretty cheap. 👌

Pics of the installation below. 👇
30974C27-87F2-4899-BC99-853D160DC1E6.jpeg


620A52D1-AFE0-4C86-B57C-8B5D91197483.jpeg


5DBA404F-BB8E-4898-BFE9-0848649D3A19.jpeg


ED611DDA-B5CD-4682-BB9E-438C92BFB2A1.jpeg


F6CD65CD-DD8B-4E2B-A2A7-CAC6E31891DE.jpeg


7A26A777-DF20-45F6-A44D-C5CD81B69358.jpeg


DE5A55F0-9738-4975-A807-1DA45A364211.jpeg


851FFB5E-E740-4313-869E-8E38C24C99FC.jpeg


25BE399D-B54E-4699-B5D4-ACC390556A68.jpeg


B3A9122D-6543-4826-ACA7-128752B3EBE1.jpeg


7CB7CB0E-37C3-4CB8-8839-D39290059A98.jpeg


DC8A8220-F769-48A5-B956-F105FCDEB692.jpeg


2CADA18B-9DD7-4B85-B4A0-89A169247644.jpeg


DA9E22BB-0456-43C9-B966-704480347582.jpeg


92BA22EF-1FF2-4133-9770-98FAAB56AE72.jpeg


F1A3AA31-AD00-46A4-9FD1-C7A598A52013.jpeg

View attachment 275754 View attachment 275755 View attachment 275756 View attachment 275757 View attachment 275758 View attachment 275759 View attachment 275760 View attachment 275761 View attachment 275762 View attachment 275763 View attachment 275764 View attachment 275765 View attachment 275766 View attachment 275767 View attachment 275768
View attachment 275776 View attachment 275778 View attachment 275779 View attachment 275780 View attachment 275781 View attachment 275782
The led light still works too! 😎
It was pretty confused until I got down to that last half dozen pictures and realized you had made a sonic blaster 😃 that is crazy man!
 

King blitz

Premium Member!
Premium Member
Build Thread Contributor
Messages
2,409
Reaction score
2,864
Location
Rhode island
Arrma RC's
  1. BigRock 4x4
  2. Outcast 6s
Hammer’s homemade impact train horn build.
This was one of the more fun projects I’ve done in awhile. 😁

What’s involved you ask..? Well it’s pretty simple and cheap if you have an old cordless impact or drill laying around. Then all you need is this $30 horn and compressor kit found on Amazon. A dremel with some accessories (grinding wheel, sanding drum, rasping bit), a Phillips screwdriver, a soldering iron if you want, heat shrink, hot glue gun and some patience.

First off start by disassembling the impact/drill. Remove the motor assembly and clip the wires as close to motor as possible. Then clean out dust and dirt if it’s old like mine.
After it’s all clean you can start by test fitting the compressor. Mine fit with almost no effort at all. Just some light dremel work above the trigger was all it needed. Also had to make some clearance for the compressor wires (rasping bit) but overall super easy.

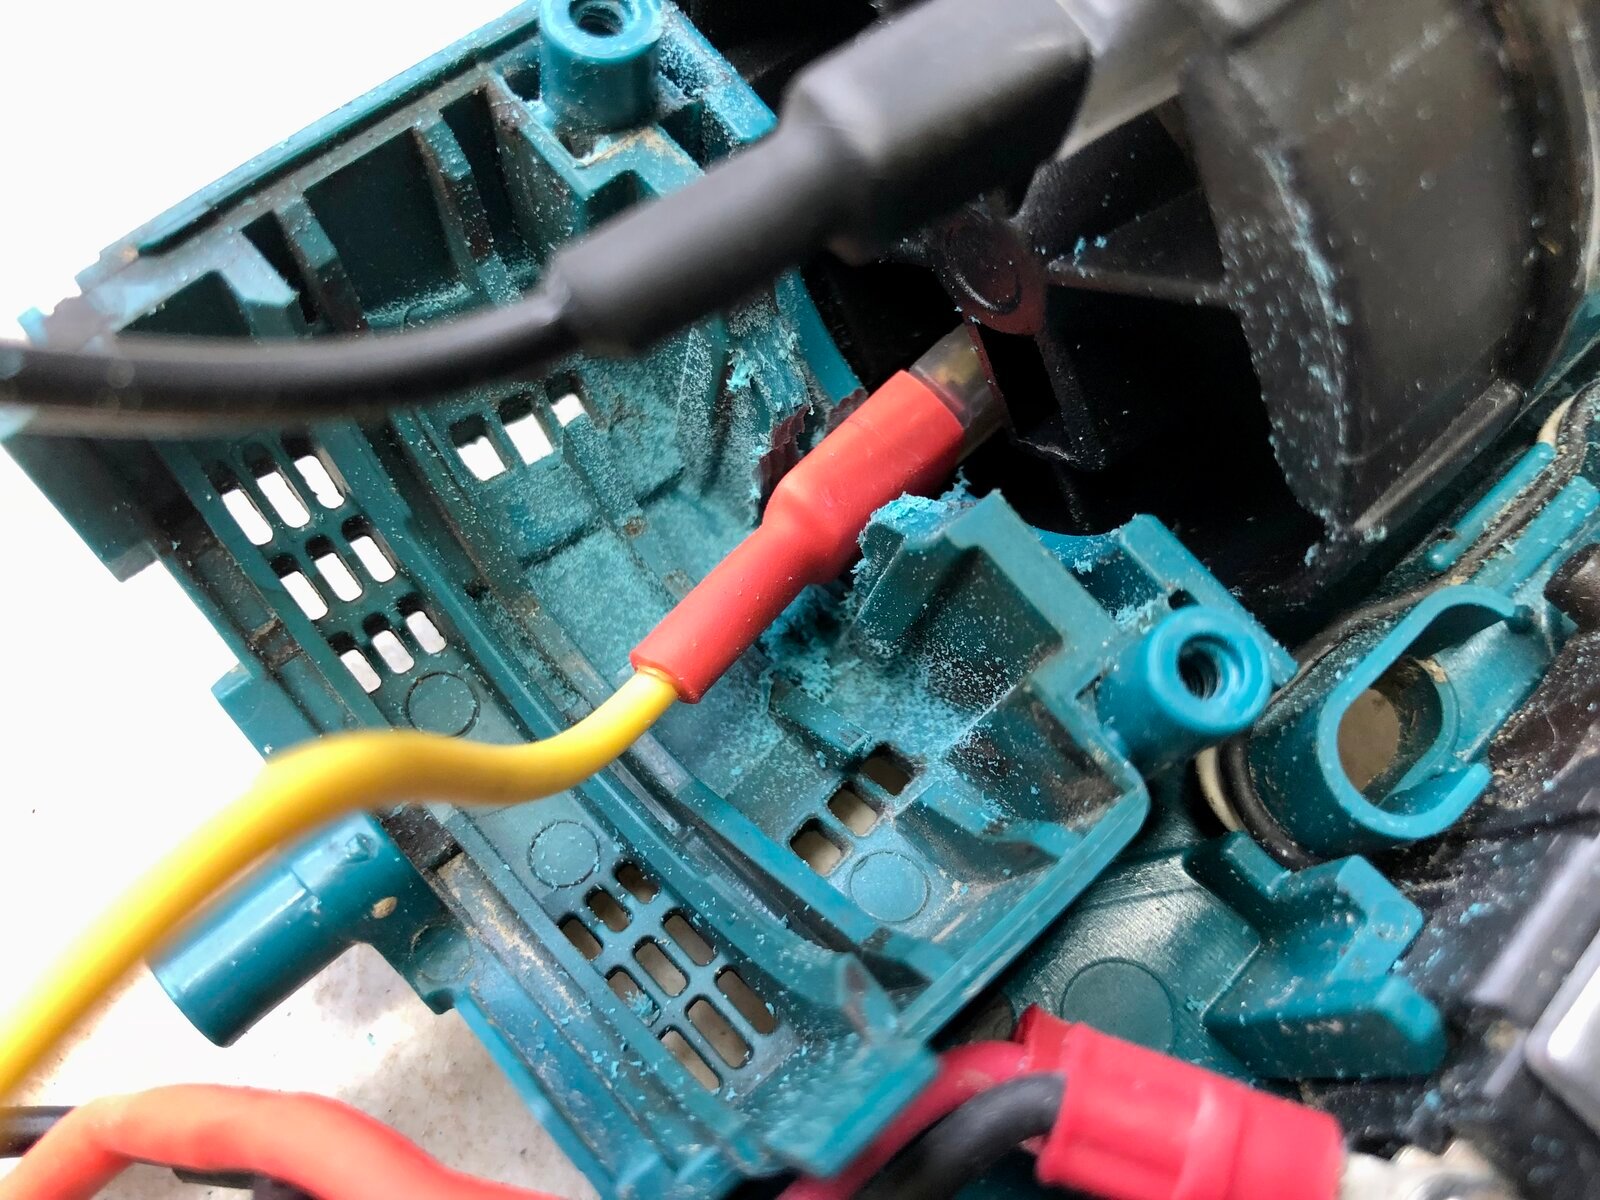
After you fit the compressor in the drill housing, you can connect the wiring from the trigger to the clearly marked +/- posts on the compressor. I chose to splice the existing wiring to the wires that came with the compressor. Mainly because they already had connectors on them.

Once all your wiring and compressor fitting is done you can hot glue, epoxy or whatever you choose to hold the compressor firmly in the drill case. Then reinstall all the screws holding the case together.

Next is the mounting of the horns. I decided to slot them into the back cover of the case. As that was the cleanest and easiest way. Once the slot was how I wanted I was able to drill some holes in the back cover and bolt them on solid.

Finally put the back cover on, cut the air line to length and install between the compressor and horns. Install a battery and some ear plugs.. and let’er blow! 😈

This was a super fun and easy build. Plus if you have an old impact or drill it’s pretty cheap. 👌

Pics of the installation below. 👇
30974C27-87F2-4899-BC99-853D160DC1E6.jpeg


620A52D1-AFE0-4C86-B57C-8B5D91197483.jpeg


5DBA404F-BB8E-4898-BFE9-0848649D3A19.jpeg


ED611DDA-B5CD-4682-BB9E-438C92BFB2A1.jpeg


F6CD65CD-DD8B-4E2B-A2A7-CAC6E31891DE.jpeg


7A26A777-DF20-45F6-A44D-C5CD81B69358.jpeg


DE5A55F0-9738-4975-A807-1DA45A364211.jpeg


851FFB5E-E740-4313-869E-8E38C24C99FC.jpeg


25BE399D-B54E-4699-B5D4-ACC390556A68.jpeg


B3A9122D-6543-4826-ACA7-128752B3EBE1.jpeg


7CB7CB0E-37C3-4CB8-8839-D39290059A98.jpeg


DC8A8220-F769-48A5-B956-F105FCDEB692.jpeg


2CADA18B-9DD7-4B85-B4A0-89A169247644.jpeg


DA9E22BB-0456-43C9-B966-704480347582.jpeg


92BA22EF-1FF2-4133-9770-98FAAB56AE72.jpeg


F1A3AA31-AD00-46A4-9FD1-C7A598A52013.jpeg

View attachment 275754 View attachment 275755 View attachment 275756 View attachment 275757 View attachment 275758 View attachment 275759 View attachment 275760 View attachment 275761 View attachment 275762 View attachment 275763 View attachment 275764 View attachment 275765 View attachment 275766 View attachment 275767 View attachment 275768
View attachment 275776 View attachment 275778 View attachment 275779 View attachment 275780 View attachment 275781 View attachment 275782
The led light still works too! 😎
That would be great to call my dogs in when they run away 🤣🤣.. awesome invention 👍👍
 
Top