Kraton build with upgraded cooling, lights and general bullet proofing

This site may earn a commission from merchant affiliate
links, including eBay, Amazon, and others.

ceolo87

Member
Messages
11
Reaction score
19
Arrma RC's
Hi,

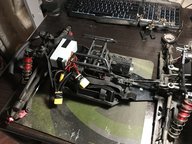
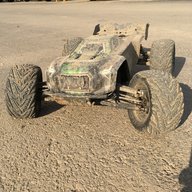
My name is Adi, I'm from Romania and this will be the build log of my 2018 kraton.

This is my first ever hobby grade RC, I've never built anything like this before. I have zero experience in RC. Furthermore, I live in an apartment building so no garage or big tools for me. Also I try and keep things as least expensive as possible but we all know how this works... So please bare with me :).

I've purchased my kraton about 2 months ago, just as stocks were starting to dissapear (that actually made me take the leap and buy it).

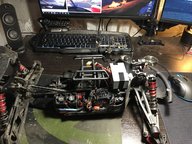
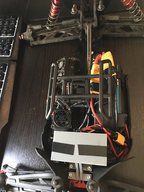
So far I have on it:

HR front and rear alu chassis braces
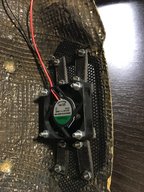
YeahRacing dual fan + radiator cooling YA-0261BK
RPM front and rear suspension arms (those are actually unmounted, beeing a newbie i didn't wanna break the rpm ones first so i've stuck with stock.. but the damn things won't give :) )
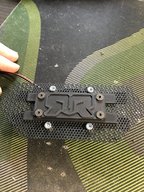
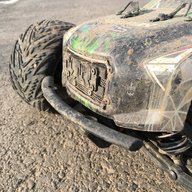
RPM front bumper/skid 81472
POS Racing rear skid plate
POS Racing Center Diff mount (built by M³)
50k/300k/50k diff oil setup
Turnigy GT5 radio and receiver setup (with gyro built in)
Voltage Hobbies Servo Mount
Servo: Power HD DW-25LV
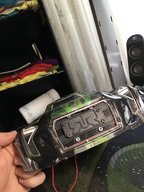
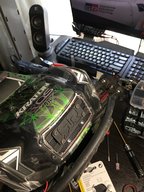
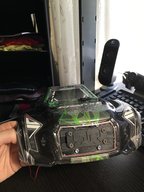
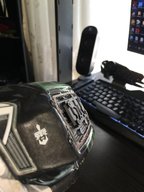
Reinforced body with shoe goo, drywall tape and liquid rubber layer

All of the above are pretty standard upgrades i'd say of the plug and play nature (well, screw and play). I did strip a few threads here, mounted the receiver vertical instead of horizontal there... but other than that all went as smooth as it could for a newbie like me.

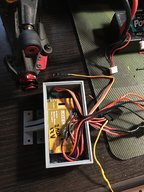
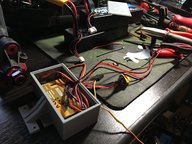
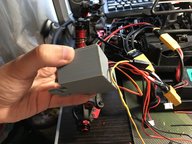
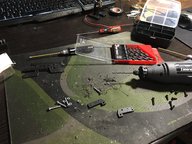
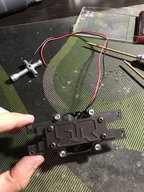
Moving on to the custom stuff i've added and of which i'll be showing pictures in the below post.
 
Last edited:
Dual dual channel Matek systems UBEC (sku 090000010-0 on HK) for a quad voltage output. Configured in 2 x 5v, 1 x 6v and 1 x 12v. Mounted in custom 3d printed box designed by me to fit on the stock v3 mudflaps mounts

They have been conformal coated with a quad layer for waterproof operation but i plan on sealing the mount/box against splashes aswell.
6V is used for the Servo (upgrade ready for higher voltage servos)
12v is used for the front grill fan and future leds
Dual 5v is not used for anything now. May switch receiver from stock bec to this but it's not necesary now. Also may switch motor fans to operate on 6v. TBA.
 

Attachments

  • IMG_4395.JPG
    IMG_4395.JPG
    386.6 KB · Views: 144
  • IMG_4397.JPG
    IMG_4397.JPG
    330 KB · Views: 144
  • IMG_4400.JPG
    IMG_4400.JPG
    272.6 KB · Views: 120
  • IMG_4405.JPG
    IMG_4405.JPG
    440 KB · Views: 141
  • IMG_4407.JPG
    IMG_4407.JPG
    486.2 KB · Views: 144
  • IMG_4430.JPG
    IMG_4430.JPG
    299.5 KB · Views: 139
Last edited:
I have hotwired an XT60 connector to run from the stock battery connectors for all the aux systems. Both BECs are connected trough the XT60 connector for easy removal.
Installation was done today. Initial testing seemed okay but i don't know how well it will handle heat. Didn't get a chance to run it outside becuase of a torential rain that came out of nowhere.
I kindda screwed up the radio box seal and was more afraid for that than anything else. Didnt get a chance to conformal coat the turnigy receiver.

The servo has + and - running straight from the UBEC, only the signal wire is connected to the radio. I've read different opinions about this. Some say at least the - should be connected to the radio, others have it connected as i do without a problem. So far so good, everything works fine, i doubt i'll run into problems.
 
Front grill assembly. Custom designed and 3d printed. Everything is bolted on, not glued, for future removal and better attachement to the body.
Has a sunon 40x10mm fan running on 12v.
It's mostly for looks, i doubt it will have any real impact on the temperature.

It's the first iteration of the assembly but i don't think i'll change it unless it breaks.
It could've been done better but my 3d modelling skills are non existent (never done it before, this is the second project, first one beeing the BEC box above :D).
Tried to follow the stock sticker theme. Designed it as a layered grill with the arrma logo beeing extra large and non permissive so it won't suck in all the dirt.

Screws cold've been picked better but i used only what i had on hand, didnt wanna buy anything specific for this.

Also, the big hole in the body doesn't have the edges finished. Don't really know what to do there to make it look better.

Planning to do the same in the rear of the body, just before the bed. Have to design 2 ducts and a 40mm fan holder that will work as exhausts. Ofcourse, just for esthetics. That's more complicated tho and may require getting rid of the plastic skeleton that supports the roof on rollovers. I don't wanna compromise that.
 

Attachments

  • IMG_4409.JPG
    IMG_4409.JPG
    503.8 KB · Views: 113
  • IMG_4410.JPG
    IMG_4410.JPG
    487.2 KB · Views: 106
  • IMG_4413.JPG
    IMG_4413.JPG
    500.7 KB · Views: 115
  • IMG_4422.JPG
    IMG_4422.JPG
    294.1 KB · Views: 113
  • IMG_4426.JPG
    IMG_4426.JPG
    334.5 KB · Views: 116
  • IMG_4436.JPG
    IMG_4436.JPG
    263.9 KB · Views: 113
  • IMG_4438.JPG
    IMG_4438.JPG
    201.5 KB · Views: 117
  • IMG_4441.JPG
    IMG_4441.JPG
    380.6 KB · Views: 110
Evening bash. Front grill fan broke a blade. Now it sounds more angry. I'm gonna leave it like that until it rips :D
 

Attachments

  • IMG_4566.JPG
    IMG_4566.JPG
    646.3 KB · Views: 93
  • IMG_4565.JPG
    IMG_4565.JPG
    821.1 KB · Views: 93
  • IMG_4563.JPG
    IMG_4563.JPG
    488.1 KB · Views: 94
Dual dual channel Matek systems UBEC (sku 090000010-0 on HK) for a quad voltage output. Configured in 2 x 5v, 1 x 6v and 1 x 12v. Mounted in custom 3d printed box designed by me to fit on the stock v3 mudflaps mounts

They have been conformal coated with a quad layer for waterproof operation but i plan on sealing the mount/box against splashes aswell.
6V is used for the Servo (upgrade ready for higher voltage servos)
12v is used for the front grill fan and future leds
Dual 5v is not used for anything now. May switch receiver from stock bec to this but it's not necesary now. Also may switch motor fans to operate on 6v. TBA.


My yeah racing fans did not survive the first 3 minutes bashing and jumping.

Did you have issues with the XT90 Shield covers coming off? As a precaution when I reduced my esc from 2x XT90s to a single plug since i will only run 6s batteries or 42, no series I went ahead and put some heat shrink on the XT90 that covers that cover and shrinks behind it so it will never pop off bashing. Next time I will heat shrink the solder joints and still slide and lock the cover over the heat shrink on the wires then I wont need the outside heat shrink.

If you want pictures LMK

I am making a custom plate to change my 2x yeah racing fans which are literally destroyed to a single 5v 60mm Fan that puushes 15 CFM and draws like .2A vs the .6A 2 yeah racing fans blow.
 
Old Thread: Hello . There have been no replies in this thread for 90 days.
Content in this thread may no longer be relevant.
Perhaps it would be better to start a new thread instead.
Back
Top