Senton Project Senton 3s, Finally Ordered!

This site may earn a commission from merchant affiliate
links, including eBay, Amazon, and others.

RJUK

Active Member
Messages
214
Reaction score
141
OK, so after much consideration I decided to stick to my original plan of picking up a Senton 3s as my first proper hobby-grade RC car. (Well, I have a Tamiya car donkey's years ago that I assembled from scratch, but built it when I was a kid and haven't used it in years.)

So, I have the following on order. Anything I missed?!

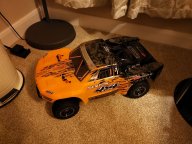
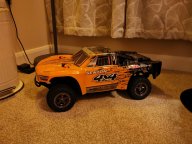
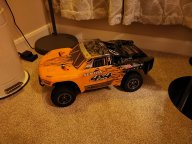
Arrma Senton 3s (black/orange)
SkyRC D100v2 dual balance charger
Charger to EC5 cables (X2)
gensacearespammers 3s Lipo, 50c, 5000mAh
TBR XV4 front and rear bumpers
TBR chassis skid plate
Arrma side guard set
Team Fast Eddy sealed bearing kit
Sunfounder 20kg server
Kimbrough KP123 server saver
dBoots Fortress tyres & wheels
2 X Ovonic 3s Lipo (50c, 5500mAh)
A set of EC5 connectors for these batteries
A soldering Iron and mat to fit the connectors
2 X Lipo safe bags
DumboRC radio with gyro
An RC workstand

Aaand I think that's it! (Got a bit carried away!)

The only thing I think I might have missed is a different pinion gear to help with the new wheels, though I'm not sure if it's necessary? The wheels are from the Granite and doesn't the Granite have the same motor etc as the Senton 3s?

I'll update the thread as bits arrive and as I'm trying to upgrade, possibly begging for assistance when/if I cock something up.

Hopefully some find this interesting...

Thanks
Russell
 
What do I need?

I have a ton of sockets and tools for real cars, so will that kinda thing be what's needed for the Senton, or are there RC specific tools that I'll need?

I think the Arrma cars usually come with a few basic tools, don't they?
 
You want a hex set with 1.5mm 2mm 2.5mm 3mm bits, I use a fastrax set. Also I use a small 12v drill with arrowmax hex bits but also tighten the last couple of threads by hand.

You may want to research the throne bumpers on here, a bunch of people weren't happy with them.
 
Pretty good start RJUK...
The MIP are good tools.
If you run with Granite wheels/tires, it will be more demanding on slipper clutch, especially on tarmac.
Yes, the Senton and Granite has the same engine.
To your list, I would add 50 mm turnbuckle (AR330214 ) with composite ball cup (AR330230) and steel ball (AR310450) from Senton 6s. That set up is on my son Typhon 3s.
 
You want a hex set with 1.5mm 2mm 2.5mm 3mm bits, I use a fastrax set. Also I use a small 12v drill with arrowmax hex bits but also tighten the last couple of threads by hand.

You may want to research the throne bumpers on here, a bunch of people weren't happy with them.
Would something like this be OK?

https://rover.ebay.com/rover/0/0/0?mpre=https://www.ebay.co.uk/ulk/itm/174144436534
Pretty good start RJUK...
The MIP are good tools.
If you run with Granite wheels/tires, it will be more demanding on slipper clutch, especially on tarmac.
Yes, the Senton and Granite has the same engine.
To your list, I would add 50 mm turnbuckle (AR330214 ) with composite ball cup (AR330230) and steel ball (AR310450) from Senton 6s. That set up is on my son Typhon 3s.
I searched MIP on eBay and their version is around £40 and includes one fewer size... Is the set I've linked above likely to be adequate, or is the MIP likely to be much better? I tend to prefer to get good tools where necessary. The right tool always makes a difference, I find.
Pretty good start RJUK...
The MIP are good tools.
If you run with Granite wheels/tires, it will be more demanding on slipper clutch, especially on tarmac.
Yes, the Senton and Granite has the same engine.
To your list, I would add 50 mm turnbuckle (AR330214 ) with composite ball cup (AR330230) and steel ball (AR310450) from Senton 6s. That set up is on my son Typhon 3s.
Just been looking for the Arrma parts you mentioned.

I guess the composite ball cups are all replacement suspension and steering components in a stronger version? Is it worth swapping them out from day 1?

What's the turnbuckle for? And what about the steel balls?

Just wondering where it all goes on the truck?

Thanks!
 
Last edited:
Sorry, I did not say, it's the upper rod. No obligation to swap the upper rod on day 1. It goes here;

IMG_2chhgchgc695.jpg


Beefer and stronger than stock one. Just check the lower one. It's a 3 parts component for doing those rods. (3 parts number Arrma)
We broke so many in the past...
 
No obligation to swap the upper rod on day 1. It goes here;

View attachment 59448

Beefer and stronger than stock one. Just check the lower one. It's a 3 parts component for doing those rods.
We broke so many in the past...
That's the composite ball cups, right?

What about the turnbuckle and steel balls?

Sorry if this is basic stuff, just trying to get an idea of what it all is!
 
Rod;
The silver brace is the turnbuckle;
The composite ball cup is the black plastic end;
The silver little ball inside the ball cup is the steel ball;
12_9c4839b7-8136-43d3-88e0-bfb1e24f6f46_grande.jpg
 
2mm hex tip & drive
2.5mm hex & driver
Cordless screwdriver with clutch
5mm wrench
Shock tool (Tekno)
Snips
Body reamer
Soldering iron
Heat gun
Blue thread lock
CA glue
Lipo checker
GPS speed meter
 
Rod;
The silver brace is the turnbuckle;
The composite ball cup is the black plastic end;
The silver little ball inside the ball cup is the steel ball;
View attachment 59468
Gotcha, thanks. So basically just spares for if/when these pieces break? Or are the bits you've mentioned stronger than stock?
 
2mm hex tip & drive
2.5mm hex & driver
Cordless screwdriver with clutch
5mm wrench
Shock tool (Tekno)
Snips
Body reamer
Soldering iron
Heat gun
Blue thread lock
CA glue
Lipo checker
GPS speed meter
Yikes, there's a shopping list!

I guess the GPS meter is optional and only if you care about top speed runs!

LiPo checker arrived today. Think I have blue threadlock, bought snips, have a heat gun, don't think I'll need a body reamer?

Bought the hex drivers and have an electric screwdriver or two.

Is it worth me pulling the truck apart when it arrives and boiling or soaking the suspension arms in WD40 to make them more flexible?

Also, am I likely to need the shock tool much? The Tekno one ain't cheap!
 
Gotcha, thanks. So basically just spares for if/when these pieces break? Or are the bits you've mentioned stronger than stock?

Yes, basic spares. Yes, a bit stronger.
 
Yikes, there's a shopping list!

I guess the GPS meter is optional and only if you care about top speed runs!

LiPo checker arrived today. Think I have blue threadlock, bought snips, have a heat gun, don't think I'll need a body reamer?

Bought the hex drivers and have an electric screwdriver or two.

Is it worth me pulling the truck apart when it arrives and boiling or soaking the suspension arms in WD40 to make them more flexible?

Also, am I likely to need the shock tool much? The Tekno one ain't cheap!
I would run the stock arms and then buy RPMs if and when they break.

If you ever need to do work on shocks (inevitably you will) or change pivot balls (you will) then that tool is worth every penny. At $28 it’s not really that expensive. There a knock offs for a little less.
 
Well the truck arrived here earlier this week. I'm waiting for the TBR skid plate and bumpers before using the truck and I still need to solder the EC5 connectors onto some of my batteries. I bought an 8000mAh 2S and two 5500mAh 3s batteries with Dean's (I think) connectors, so I'm going to chop and swap them for EC5.

I also have a set of Granite wheels on the way and a blue Senton body, plus a 15T pinion, so I can cut one of the bodies for the larger tyres and swap the pinion to suit. Is swapping the pinion an easy job?

For now, here's the stock truck... (Although I'm sure you know what it looks like...)
 

Attachments

  • IMG_20200108_230844.jpg
    IMG_20200108_230844.jpg
    360.1 KB · Views: 46
  • IMG_20200108_230907.jpg
    IMG_20200108_230907.jpg
    280.4 KB · Views: 46
  • IMG_20200108_230900.jpg
    IMG_20200108_230900.jpg
    346.4 KB · Views: 40
Well the truck arrived here earlier this week. I'm waiting for the TBR skid plate and bumpers before using the truck and I still need to solder the EC5 connectors onto some of my batteries. I bought an 8000mAh 2S and two 5500mAh 3s batteries with Dean's (I think) connectors, so I'm going to chop and swap them for EC5.

I also have a set of Granite wheels on the way and a blue Senton body, plus a 15T pinion, so I can cut one of the bodies for the larger tyres and swap the pinion to suit. Is swapping the pinion an easy job?

For now, here's the stock truck... (Although I'm sure you know what it looks like...)
The hardest part of the pinion swap is getting the power module out the first time. It usually is stuck with TL on the input gear to rear slipper hub connection.
 
The hardest part of the pinion swap is getting the power module out the first time. It usually is stuck with TL on the input gear to rear slipper hub connection.

Pry up on the lever of the module with a long flat head screwdriver. Use a long Phillips head to push and tap the screwdriver handle with a hammer. Should come out after a few taps.
 
Yeah don't do what I did and heman it... when it finally came out it took the center bearing support out with it ?‍♂️
 
Pry up on the lever of the module with a long flat head screwdriver. Use a long Phillips head to push

Yep, kind of that; lift a bit with driver and pull with fingers;

IMG_2732.JPG


Congrats for the Senton.
 
Old Thread: Hello . There have been no replies in this thread for 90 days.
Content in this thread may no longer be relevant.
Perhaps it would be better to start a new thread instead.
Back
Top