Littleman456
Member
- Messages
- 3
- Reaction score
- 5
- Arrma RC's
- Raider
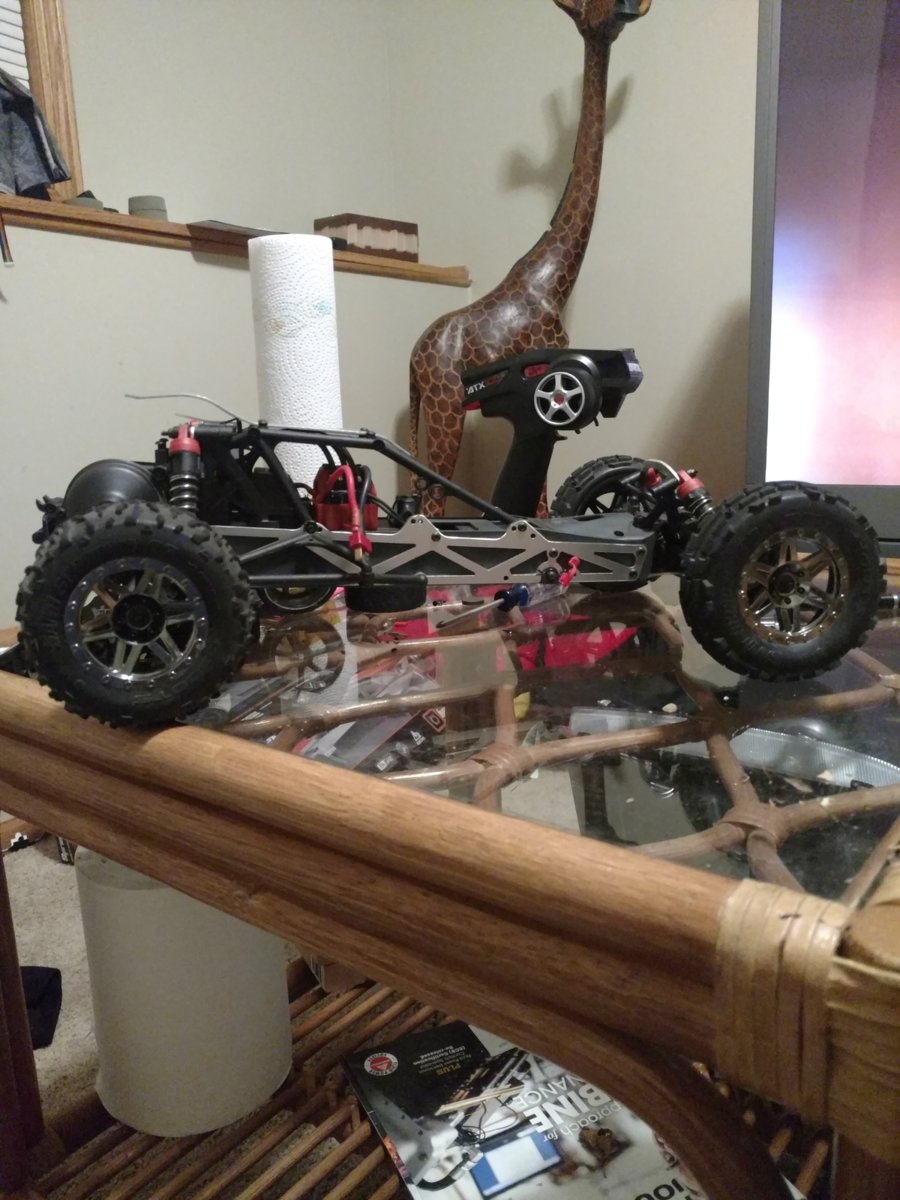
So I picked up a Raider XL BLX from the LHS for some on track bashing mostly, but just an all around basher. Only chose the Raider XL because 2wd sounded like fun and I've always wanted a buggy. Anyway, out of the box the thing ripped pretty good. Shocks looked like junk and the first time out I popped three outa four of the tops. I picked up some Traxxas Big Bore's for the 2wd Slash I think. These dramatically helped the handling, predictability and stability of the buggy. I have no idea how to set up shocks/springs so I just used what they came with. Then I had issues with the rear camber links popping off the ball mounts, as well as shocks pulling mounting screw out of the lower A arms, and tossing dog bones. So after about two hours of mixing and matching parts at the LHS here's what I've come up with. I run my Raider essentially naked, and with a custom roof, its ugly but doesn't tear up shock mounts when I flip it. (excuse the background, I don't have an r/c workbench set up... yet)
Stock side and rear shots for comparison:
A few of the parts I used, RPM E-REVO bearing carriers, RPM SC10 lower control arms, Traxxas closed end turnbuckles, and misc hardware
RPM Team Associated control arms vs. Arrma Raider, notice the length difference. The chassis side did have to be trimmed with a razor blade to fit, and the bearing carrier mounting holes need to be drilled out. I did also have to add three small washers in front of the bearing carriers as the E-Revo carriers are narrower than the SC10 ones.
A few rear end suspension pics. The E-Revo bearing carriers move the cups up and in enough to make the stock dog bones fit PERFECT. It is worth noting that I did stack the stock bearing on the cup side of the axle. I also moved the tops of the rear shocks down to the lower bolt on the shock brace. You will need a longer bolt for this, but it will lift the rear end considerably.
In the front all I did was add the Big Bores. I did have to trim the control arms a hair to fit the bottom of the shock to fit in the inner mounting hole but it works well and again, lifts the buggy.
Here are some final rear and side shots showing that it easily clears a 5000mah 2s hardcase battery. The thing is almost bulletproof at this point, no longer tosses dogbones or strips mounting holes. I did discover today though that my servo saver pin SNAPPED IN HALF. I'm not sure how this is possible since its a metal pin surrounded by plastic parts...
I'll keep this updated but I don't plan on doing much more except DEFINITELY A NEW SERVO SAVER (can you tell I'm not happy about it).
Stock side and rear shots for comparison:
IMG_20161021_192309602
Parts used on rear end, not all pictured.
Traxxas: 3745, 5116, 2592, 2756, 5116
RPM: 70742, 80382
Traxxas: 3745, 5116, 2592, 2756, 5116
RPM: 70742, 80382
IMG_20161022_241046996
Traxxas Big Bores, Traxxas closed end camber arms, RPM control arms, RPM bearing carriers
IMG_20161024_211819476
Note shock placement on top! A longer screw will hold the shock here well and lift the rear...
IMG_20161024_211858409
Front Big Bore shocks, needed slight clearancing of the lower control arm to clear the lower...
I'll keep this updated but I don't plan on doing much more except DEFINITELY A NEW SERVO SAVER (can you tell I'm not happy about it).


