Talion Talion v3 front end rebuild

This site may earn a commission from merchant affiliate
links, including eBay, Amazon, and others.

Slyslinger

Member
Messages
31
Reaction score
9
Arrma RC's
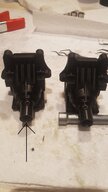
I smacked a pole going about 60 and my front end exploded needed a new front diff case new a arms shock mounts etc.. I'm just learning about rcs. I'm stuck on how to get the bearing out the old front diff casing along with that little gear. Any info would help. I have more things to rebuild and have little time so I may have more questions. Thanks
 
Hi @Slyslinger. To get the pinion out of the bulkhead, you need to remove the out drive. There's a grub screw on the outside, which you will need to heat up to remove. Once that's out, you need to push the pinion from the outside, through the center of the out drive, as I've pointed out in the photo. This isn't the easiest of tasks, as Arrma uses red loctitie on the grub screw, and it sometimes bleeds down over the shaft of the pinion, and causing it to stick. A little heat on the out drive, and some gentle tapping on the end of the pinion's shaft, and you should be able to knock it through towards the inside of the case. Once you've replaced the bearings, just put a drop of blue loctite onto the grub screw before you reassemble. If that grub screw has never been out, don't try to loosen it without heating first. Stripped grub screws are a nightmare. A micro torch or soldering iron will do the job. The torch works fast, maybe just 10 seconds of heat to get the job done. The iron takes longer, maybe a minute or two. Be sure to use the best driver or allen wrenches you have, so as not to strip that screw. If there's anything you don't understand about what I've mentioned, let me know, and I'll try to clarify.
 

Attachments

  • 20190113_142023 - Copy.jpg
    20190113_142023 - Copy.jpg
    142 KB · Views: 42
Hi @Slyslinger. To get the pinion out of the bulkhead, you need to remove the out drive. There's a grub screw on the outside, which you will need to heat up to remove. Once that's out, you need to push the pinion from the outside, through the center of the out drive, as I've pointed out in the photo. This isn't the easiest of tasks, as Arrma uses red loctitie on the grub screw, and it sometimes bleeds down over the shaft of the pinion, and causing it to stick. A little heat on the out drive, and some gentle tapping on the end of the pinion's shaft, and you should be able to knock it through towards the inside of the case. Once you've replaced the bearings, just put a drop of blue loctite onto the grub screw before you reassemble. If that grub screw has never been out, don't try to loosen it without heating first. Stripped grub screws are a nightmare. A micro torch or soldering iron will do the job. The torch works fast, maybe just 10 seconds of heat to get the job done. The iron takes longer, maybe a minute or two. Be sure to use the best driver or allen wrenches you have, so as not to strip that screw. If there's anything you don't understand about what I've mentioned, let me know, and I'll try to clarify.

Thank you so much.. I'm at work but when I get home I'll try to heat up that grub screw.. I was wondering why it was so tuff to unscrew thank you for the detailed reply and I'm sure I'll have alot more questions haha
 
Thank you so much.. I'm at work but when I get home I'll try to heat up that grub screw.. I was wondering why it was so tuff to unscrew thank you for the detailed reply and I'm sure I'll have alot more questions haha
Np. Try to remember that the first time you take apart any metal to metal screws on an Arrma, heat them up first. The overly excessive use of red loctite from the factory is annoying, but a little heat remedies it pretty quick. Always use blue loctite before reassembling, as the vibrations of the 6s line will cause them to back out pretty easily. When you use loctite, you should allow about 24 hours of cure time before using the truck again. If you run right after you put it back together, the bond is never as good.
 
Np. Try to remember that the first time you take apart any metal to metal screws on an Arrma, heat them up first. The overly excessive use of red loctite from the factory is annoying, but a little heat remedies it pretty quick. Always use blue loctite before reassembling, as the vibrations of the 6s line will cause them to back out pretty easily. When you use loctite, you should allow about 24 hours of cure time before using the truck again. If you run right after you put it back together, the bond is never as good.

Bro thank you so much I now have swapped to the new one. The cover for the diff case was tuff for me to get it flush but I eventually got it. Now it's time to swap over to the rpm a arms. Hopefully I won't have trouble with that. I'm still waiting for a gpm upper bulkhead shock mount. I will be bashing soon!!!
 
Now I'm having trouble getting the arrma top plate to line up..seeming somthing is bent not to sure but it seems a little crooked for some reason
 
Ok so I have everything lined up and mostly put together except the lower front hinge pins are sticking to far out for me to put the bumper on.. does the bumper mount under the chassis or slide into that groove under the front mount? How far are the hinge pins supposed to stick out? I'll post pic later
 
Ok so I have everything lined up and mostly put together except the lower front hinge pins are sticking to far out for me to put the bumper on.. does the bumper mount under the chassis or slide into that groove under the front mount? How far are the hinge pins supposed to stick out? I'll post pic later
Bang those pins back. There should be much of them showing.
 
Alright I didn't want to hit them with a hammer but I'll try that when I get home
Don't smash them. But I've had to hit them to get them all the way in.
 
Alright I didn't want to hit them with a hammer but I'll try that when I get home
Use the handle of a screwdriver, rubber handled if you have one. Just tap them gently until they go into place. You may have to move the arm a bit to line up the hole.
 
Was I supposed to put the shim in the diff case it's just dangling onto nothing and can slide around sorry man I'm a noob?
If you're talking about the shim that slides over the cup that's on the same side as the ring gear, yes.
 
Do you have a pic of he shim you are referring to? Guessing it is the shim on the left side by my thumb in the pic below.
AA12407C-EE43-4765-A403-5AA6463DFE0C.jpeg
 
Use the handle of a screwdriver, rubber handled if you have one. Just tap them gently until they go into place. You may have to move the arm a bit to line up the hole.

If you're talking about the shim that slides over the cup that's on the same side as the ring gear, yes.

I really appreciate the info. Yes I gently tapped the hinge while moving the arms and they slid right in, perfect info. That is the shim I'm talking about it goes on the gear side sweeet. Thank you all for the great replys ??
 
Old Thread: Hello . There have been no replies in this thread for 90 days.
Content in this thread may no longer be relevant.
Perhaps it would be better to start a new thread instead.
Back
Top