Looks great Chris!!Working on a copper exhaust hood. I for got to take pictures when I first started but when it's all done. It should look pretty cool. Hopefully I can talk my boss out of having me solder any of it. Hard to make a soldered lap joint look pretty
View attachment 260841
View attachment 260843
View attachment 260844
View attachment 260845

Navigation
Install the app
How to install the app on iOS
Follow along with the video below to see how to install our site as a web app on your home screen.
Note: This feature may not be available in some browsers.
More options
You are using an out of date browser. It may not display this or other websites correctly.
You should upgrade or use an alternative browser.
You should upgrade or use an alternative browser.
What did you work on today?
- Thread starter olds97_lss
- Start date
This site may earn a commission from merchant affiliate
links, including eBay, Amazon, and others.
links, including eBay, Amazon, and others.
Gonna be exciting to you. That's what matters.While not exciting to most cause it’s stock electronics, got the electronics done and installed. Looking forward to just having some fun with it , 23t pinion .
View attachment 260855
View attachment 260856
- Messages
- 4,292
- Reaction score
- 13,118
- Location
- North Liberty, IA
- Arrma RC's
- Infraction
- Kraton 6s
- Typhon 3s
- Typhon 6s
Exactly, a vehicle that runs & drives is waaay more exciting than one just sitting there!Gonna be exciting to you. That's what matters.

Took the tray off for the last time “hopefully” installed the saga strap. “Awesome quality”

Last month I sheared the rear input of a new 4s slipper clutch off in the Big Rock and was pissed so I put it off to the side, well I now know a bearing on the main input gear failed causing the clutch failure. I've had a hot-racing diff case waiting to be installed for a couple month's now, at least I can check that off the list. The best part of this repair was that once done I got to disassemble and re-clean the diff housing, turns out that one bb found it's way back into the housing and jammed the input/ring gear's while installing the motor, I know patience come's with age or else this thing would be up for target practice, BUT IT'S ALL AWESOME NOW!


Johnny b
Very Active Member
Sweet! Enjoy.Gonna be exciting to you. That's what matters.
Home-made gps power cable… never again have to worry about it being dead and having to wait 

Warby
"Hurry up and wait"
Premium Member
ArrmaForum Fan
Hospitality Award
Rig of the Month Winner
Build Thread Contributor
- Messages
- 4,772
- Reaction score
- 12,931
- Location
- Australia, WA.
- Arrma RC's
- ADX-10
- BigRock 4x4
- Limitless
- Kraton 6s
- Senton 3s
- Senton Mega
- Typhon 3s
- Typhon 6s
- Infraction 4x4
good idea. what voltage do they need?Home-made gps power cable… never again have to worry about it being dead and having to wait
View attachment 261162
As far as I know? A wall charger ‘depending on brand’ including cigarette/usb plug in most vehicles “for example” my ford focus hatchback.. puts out between .05 amps on the usb output. Cigarette usb plug. 1 amp to 5 amps. “Common”good idea. what voltage do they need?
wall plugs… for example “Samsung” has a 35 watt and a 25 watt… which even then with a “micro-usb” 1.0 and 2.0 standard downstream port, delivers up to 500 mA or 0.5A. MUST be at 5V; or else, there will be no power supply. The DC input port uses a 5.5mm/2.1mm plug, with a voltage ranging from 6.5V~12V. With a DC input, the output ports could switch between 3.3V and 5V. But I can’t recall what I’m set at? I’m either 5.7 or 6.8 volts between those numbers I’m not exactly sure.. but I won’t go above 7 volts. There’s no need/reason for me to since I’m doing speed l runs. I like a little delay action to not over correct. Hopefully this helps.
Warby
"Hurry up and wait"
Premium Member
ArrmaForum Fan
Hospitality Award
Rig of the Month Winner
Build Thread Contributor
- Messages
- 4,772
- Reaction score
- 12,931
- Location
- Australia, WA.
- Arrma RC's
- ADX-10
- BigRock 4x4
- Limitless
- Kraton 6s
- Senton 3s
- Senton Mega
- Typhon 3s
- Typhon 6s
- Infraction 4x4
I was going to guess 5v. Do you plug it into the rx?As far as I know? A wall charger ‘depending on brand’ including cigarette/usb plug in most vehicles “for example” my ford focus hatchback.. puts out between .05 amps on the usb output. Cigarette usb plug. 1 amp to 5 amps. “Common”
wall plugs… for example “Samsung” has a 35 watt and a 25 watt… which even then with a “micro-usb” 1.0 and 2.0 standard downstream port, delivers up to 500 mA or 0.5A. MUST be at 5V; or else, there will be no power supply. The DC input port uses a 5.5mm/2.1mm plug, with a voltage ranging from 6.5V~12V. With a DC input, the output ports could switch between 3.3V and 5V. But I can’t recall what I’m set at? I’m either 5.7 or 6.8 volts between those numbers I’m not exactly sure.. but I won’t go above 7 volts. There’s no need/reason for me to since I’m doing speed l runs. I like a little delay action to not over correct. Hopefully this helps.
- Messages
- 6,388
- Reaction score
- 12,578
- Arrma RC's
- Nero
Yes. Here’s the end result. Works perfectly. I still have to organize how I manage the wiringI was going to guess 5v. Do you plug it into the rx?
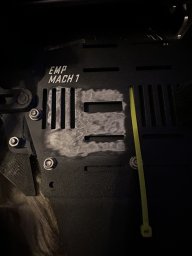
Decided to wire some of the powder coating off so that it has more of a chance to stick.
Attachments
JustAnOutcast
compulsive over-thinker, I think. 🤔
- Messages
- 278
- Reaction score
- 443
Seems I spend more time tinkering with the diffs on my OC EXB than actually running it. So.. today, I did some work on the rear diff. Watched a video by Adam Drake and he mentioned for a truck and/or truggy, if there is grinding when you start going forward, chances are rear diff needs to be shimmed tighter to the housing. I had noticed some grinding at low speed but it clears up once I accelerate. Anyway, checked the diff spacing and I was able to get another shim on the gear side without much force, tried three and it was extremely tight, so I switched back to two. Haven’t run it yet to see if the low speed grinding is fixed. Oh, video also said if you hear grinding when stopping, check front diff housing shim.

- Messages
- 2,186
- Reaction score
- 4,842
- Arrma RC's
- Kraton 8S
- Mojave
- Notorious
- Senton 6s
- Talion
Holy crap !!! I want to see a video of that FT !!!!Worked on my fireteam… yanked the max6 combo out and threw in the k8 setup.. figure the lower kv will help with this pig. View attachment 261391
View attachment 261392
Also worked on the Xmaxx a bit more..
View attachment 261393View attachment 261394
And , what servo are you running in the Xmaxx , cause with mine apart now , I am going to change out my servo even though it works , it's really slow .
Was just gonna do the 2085x and call it a day to not get all involved hacking apart the chassis to do the real 1/5 servo . But , from some vids , there are a lot of people doing the 1/10 adapter and 1/10 high torque .
Diem Turner
Yes...I have a Premium Member
Premium Member
Rig of the Month Winner
Build Thread Contributor
I finally got my work bench finished up and have started the "moving in" process.


I made a copy of Scorched RC's rear wings, both their own design and Raz Shifrin's Batwing. They share pretty much all the same parts with the exception of the side panels (yes, the top plate is slightly different, but not enough so as to warrant making both).
Here's the Scorched RC design, all finished up.


Still need to cut the side panels for the Batwing, but I've had enough of carbon fiber dust for one day.


I made a copy of Scorched RC's rear wings, both their own design and Raz Shifrin's Batwing. They share pretty much all the same parts with the exception of the side panels (yes, the top plate is slightly different, but not enough so as to warrant making both).
Here's the Scorched RC design, all finished up.
Still need to cut the side panels for the Batwing, but I've had enough of carbon fiber dust for one day.
Tex Koder
2D , 3D Not a problem. I'll take that Challenge.
Lifetime Premium!
Premium Member
ArrmaForum Fan
Excellence Award
Hospitality Award
Build Thread Contributor
- Messages
- 10,029
- Reaction score
- 25,296
- Location
- Dallas, TX (USA)
- Arrma RC's
- Granite
- Infraction
- Kraton 6s
- Mojave
- Nero
- Senton 3s
- Typhon 6s
- Vendetta
I finally got my work bench finished up and have started the "moving in" process.
View attachment 261600View attachment 261601
I made a copy of Scorched RC's rear wings, both their own design and Raz Shifrin's Batwing. They share pretty much all the same parts with the exception of the side panels (yes, the top plate is slightly different, but not enough so as to warrant making both).
Here's the Scorched RC design, all finished up.
View attachment 261602View attachment 261604
Still need to cut the side panels for the Batwing, but I've had enough of carbon fiber dust for one day.
View attachment 261605
View attachment 261603
Wow!
Are you cutting your CF with a band saw or CNC router?
Your cuts and final finish look OEM Perfect!!
I also want to know this. Lol. Looks amazing.Wow!
Are you cutting your CF with a band saw or CNC router?
Your cuts and final finish look OEM Perfect!!
Diem Turner
Yes...I have a Premium Member
Premium Member
Rig of the Month Winner
Build Thread Contributor
Thanks guys ")
I'm rough cutting with a Dremel and the composite speed-click cutting discs. Then I take it down to final size with the Dremel and a coarse sanding drum and a bench grinder and then do a final pass with a fine sanding drum on the Dremel in this drill press stand they make for Dremel. I break the edges with a quick scrub with whatever sandpaper I have within arms reach. That's pretty much it.

I'm rough cutting with a Dremel and the composite speed-click cutting discs. Then I take it down to final size with the Dremel and a coarse sanding drum and a bench grinder and then do a final pass with a fine sanding drum on the Dremel in this drill press stand they make for Dremel. I break the edges with a quick scrub with whatever sandpaper I have within arms reach. That's pretty much it.
Changed the steering servo in the Cragsman