- Messages
- 405
- Reaction score
- 611
- Location
- Tennessee
- Arrma RC's
- Kraton 4s
- Nero
- Outcast 4s
- Senton 3s
- Talion EXB
- Infraction 4x4
I started a thread originally in the discontinued section of the forum, quite a few of you were just as excited as I was to have found a Nero roller for relatively cheap. I had intended it to be my build thread, but I didn’t keep up with it do to work.
I haven’t done a build thread, so here we are. This is my kinda short build thread for my newly acquired Arrma Nero!

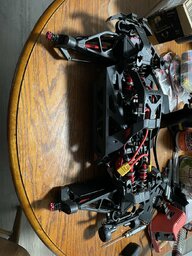
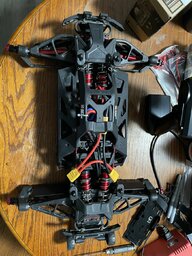
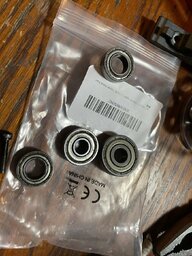
When it arrived, it was packaged mostly as you see in the photo above. Main chassis, both body’s, and a baggy of the center diff/transmission and related parts. This Nero had Hot Racing driveshafts on the rear, but they were all beat up, rusted and bent beyond repair. Front was missing drive shafts completely minus the axle that the hex hub attaches. This bad boy would need a bit of work before it was in running condition.


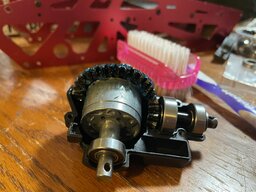
So I started tearing it apart. I took the center diff apart first, and boy it was nasty. Grease inside had turned a nasty brown color and the smell was of burnt grease and bologna? Yeah it was weird.


After I get the center diff tore apart and cleaned up, I epoxied the diff brain holes on the diff cup so I could fill it up with proper diff oil and not grease. After I took apart the center diff, I did the same for the front and rear diffs and cleaned them out, epoxied the diff brain holes and let them sit 24 hours before continuing.


I put new seals in the diffs, started with the center diff and made sure everything was shimmed up and looking good before I added the diff oil, well in this case the 20 million weight is pretty much putty, put some loctite on the screws, and put 50k in the front and rear as that’s all my unprepared butt had to use . Diffs are done woohoo!
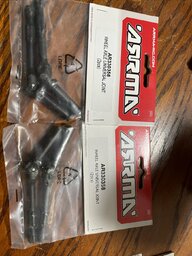
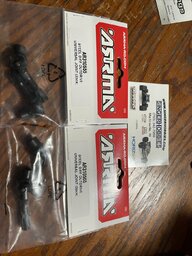
Now on to assembling the drive shafts and essentially putting everything back together. (I didn’t manage to take any pics of this process, oops!) I start by putting together the driveshafts, which are completely new btw, which were pretty easy to assemble. I get them assembled, spray the joints with a dry line, and go to work reattaching the front and rear diff bulkheads.
Once the bulk heads are in, I started putting the drive shafts into the hubs and attached the Hot Racing +5mm hex hubs first so the drive shafts stay in place while I attached them to the diff outdrives. I do all 4 drive shafts, then move on to getting the center diff/power module secured and the center drive shafts attached.
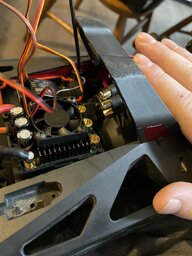
Next is to run the wiring to the receiver box, making sure to keep it all clean and tidy. I then use double sided servo tape and attach the Mamba Monster 2 to the radio tray, and noticed the motor wires are a bit too short to reach. So I had to make some extensions. Once that was done, I also had to make series adapter for the esc for the dual lipo setup. I get all the electronics hooked up, and test them to make sure steering, throttle and brakes work. Everything is in order so far.
Only thing left to do is to find some tires. I considered getting Proline Trenchers X, but couldn’t justify the 108+ dollar price tag. We all found those knock off Backflips, but I can’t be bothered with having to glue the tires lol So I found some Roapex 3.8 Tracker tires on a massive sale for 22 bucks a pair, paid 54 bucks with shipping. They are wide and have huge lugs on them for digging into the dirt and grabbing massive traction on pavement.
I picked up some lipos off Amazon to run in it, nothing fancy. I tested them out in my Erevo 2.0 and the lipos had a lot of power. They are Tindling 5200mah 100c(supposedly 100c lol) for 50 bucks. If they work and have power for what I need, then why not give them a try, right? They were in perfect balance when I got them and they balanced right up on my Hota S6.
That’s pretty much the extent of this Nero build. For now at least. I hope you all enjoyed the journey as much as I did!
Edit; Can only upload 15 pics per post! I’ll add the additional photos I took during the rebuild in a second post!
I haven’t done a build thread, so here we are. This is my kinda short build thread for my newly acquired Arrma Nero!
When it arrived, it was packaged mostly as you see in the photo above. Main chassis, both body’s, and a baggy of the center diff/transmission and related parts. This Nero had Hot Racing driveshafts on the rear, but they were all beat up, rusted and bent beyond repair. Front was missing drive shafts completely minus the axle that the hex hub attaches. This bad boy would need a bit of work before it was in running condition.
So I started tearing it apart. I took the center diff apart first, and boy it was nasty. Grease inside had turned a nasty brown color and the smell was of burnt grease and bologna? Yeah it was weird.
After I get the center diff tore apart and cleaned up, I epoxied the diff brain holes on the diff cup so I could fill it up with proper diff oil and not grease. After I took apart the center diff, I did the same for the front and rear diffs and cleaned them out, epoxied the diff brain holes and let them sit 24 hours before continuing.
I put new seals in the diffs, started with the center diff and made sure everything was shimmed up and looking good before I added the diff oil, well in this case the 20 million weight is pretty much putty, put some loctite on the screws, and put 50k in the front and rear as that’s all my unprepared butt had to use
. Diffs are done woohoo!Now on to assembling the drive shafts and essentially putting everything back together. (I didn’t manage to take any pics of this process, oops!) I start by putting together the driveshafts, which are completely new btw, which were pretty easy to assemble. I get them assembled, spray the joints with a dry line, and go to work reattaching the front and rear diff bulkheads.
Once the bulk heads are in, I started putting the drive shafts into the hubs and attached the Hot Racing +5mm hex hubs first so the drive shafts stay in place while I attached them to the diff outdrives. I do all 4 drive shafts, then move on to getting the center diff/power module secured and the center drive shafts attached.
Next is to run the wiring to the receiver box, making sure to keep it all clean and tidy. I then use double sided servo tape and attach the Mamba Monster 2 to the radio tray, and noticed the motor wires are a bit too short to reach. So I had to make some extensions. Once that was done, I also had to make series adapter for the esc for the dual lipo setup. I get all the electronics hooked up, and test them to make sure steering, throttle and brakes work. Everything is in order so far.
Only thing left to do is to find some tires. I considered getting Proline Trenchers X, but couldn’t justify the 108+ dollar price tag. We all found those knock off Backflips, but I can’t be bothered with having to glue the tires lol So I found some Roapex 3.8 Tracker tires on a massive sale for 22 bucks a pair, paid 54 bucks with shipping. They are wide and have huge lugs on them for digging into the dirt and grabbing massive traction on pavement.
I picked up some lipos off Amazon to run in it, nothing fancy. I tested them out in my Erevo 2.0 and the lipos had a lot of power. They are Tindling 5200mah 100c(supposedly 100c lol) for 50 bucks. If they work and have power for what I need, then why not give them a try, right? They were in perfect balance when I got them and they balanced right up on my Hota S6.
That’s pretty much the extent of this Nero build. For now at least. I hope you all enjoyed the journey as much as I did!
Edit; Can only upload 15 pics per post! I’ll add the additional photos I took during the rebuild in a second post!
Last edited:


")