The-Terminator
Fairly New Member
- Messages
- 7
- Reaction score
- 8
Hello all!
i have get my Neptune 4 MAX and its a huge good and nice printer.
out if the box i assembled it and did the bed leveling things.
and direct printed the benchy.. and that works perfect. it was the first print.
after installing prusaslicer and the newest elegoo cura and see and compare settings etc..
i have now a problem that i can not get the printer to print...
it seems the fillement will krull arround the head.. and will not stick to the buildplate anymore and my fillement is complete new out the box vacuum sealed etc.
never had issues with my fillement on my other small printers but now it looks like it make the fillement bubbles etc..
what i did after see tuning videos etc.. nothing help...
i did:
1 - update the firmware to the newest 1.2.2.65 - no result
2 - take the head of, and look inside if it was clogged or dirt in it - no result
3 - well 20 times bed leveling done... and my bed is really quiete flat - no result
4 - change the messing 0.4mm head wit hthe one as spare in the package - no result
5 - print again the benchy from the USB that was deliverd... ( the first print that works) - no result
6 - check all bolts and settings - no result
7 - play in the menu with extrude and tempurture.. seems that by 195 degree celsius the bubbles get less but then i get motor skipping.. so its to low temp for PETG
8 - try other roll of PETG... also other brand.. and also new in back (sealed air tight) so almost no moister in it.. (beside i allways print with this filement and never had issues)
9 - try other profiles found on youtube for prusa slicer 4 Pro, can be used for MAX to - no result
10 - print on 80 Celsius headbed - no result
11 - print with gluestick and tape and captontape... all no result
12 - checked serveral times the first layer hight.. its set as given in the instructions.. but still the filement krulles arround the head and you get a blob.
so in really disapointed and sad that im not get that extrusion good and get stick to the buildplate..
i don't know what to do now.. its really weird why my printer does not print anymore after 1 test print.
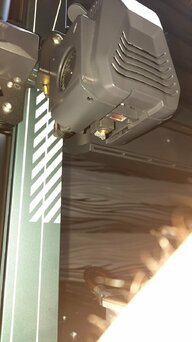
i uploaded a macro picture ofthe fillement bubbeling... and the benchy that went very well as first print
best regards,
Mark
.jpeg")
.jpeg")
.jpeg")
.jpeg")


.jpeg")
i have get my Neptune 4 MAX and its a huge good and nice printer.
out if the box i assembled it and did the bed leveling things.
and direct printed the benchy.. and that works perfect. it was the first print.
after installing prusaslicer and the newest elegoo cura and see and compare settings etc..
i have now a problem that i can not get the printer to print...
it seems the fillement will krull arround the head.. and will not stick to the buildplate anymore and my fillement is complete new out the box vacuum sealed etc.
never had issues with my fillement on my other small printers but now it looks like it make the fillement bubbles etc..
what i did after see tuning videos etc.. nothing help...
i did:
1 - update the firmware to the newest 1.2.2.65 - no result
2 - take the head of, and look inside if it was clogged or dirt in it - no result
3 - well 20 times bed leveling done... and my bed is really quiete flat - no result
4 - change the messing 0.4mm head wit hthe one as spare in the package - no result
5 - print again the benchy from the USB that was deliverd... ( the first print that works) - no result
6 - check all bolts and settings - no result
7 - play in the menu with extrude and tempurture.. seems that by 195 degree celsius the bubbles get less but then i get motor skipping.. so its to low temp for PETG
8 - try other roll of PETG... also other brand.. and also new in back (sealed air tight) so almost no moister in it.. (beside i allways print with this filement and never had issues)
9 - try other profiles found on youtube for prusa slicer 4 Pro, can be used for MAX to - no result
10 - print on 80 Celsius headbed - no result
11 - print with gluestick and tape and captontape... all no result
12 - checked serveral times the first layer hight.. its set as given in the instructions.. but still the filement krulles arround the head and you get a blob.
so in really disapointed and sad that im not get that extrusion good and get stick to the buildplate..
i don't know what to do now.. its really weird why my printer does not print anymore after 1 test print.
i uploaded a macro picture ofthe fillement bubbeling... and the benchy that went very well as first print
best regards,
Mark
")