A Better Receiver Box

This site may earn a commission from merchant affiliate
links, including eBay, Amazon, and others.

Jamr

Very Active Member
Messages
444
Reaction score
1,121
Arrma RC's
  1. Fireteam
  2. Gorgon
  3. Infraction
Happy Friday everyone.
I am hoping to get some input from all the really inventive RC people out there.
I am trying to make the ultimate receiver box for people that have the room for it.
I like to separate the power requirements of my extra electronics (Lights, sounds) on my cars from the receiver and to the battery directly so they do not suck the power off of the receiver.
I also like to put a fuse holder and buck voltage converter on that fused battery line so that I do not have to run a resistor at every LED I use. Since batteries come in all different voltages I use a BVC to convert that voltage to a straight 6vdc or 3vdc. It just makes it easier when adding on other electronics later.
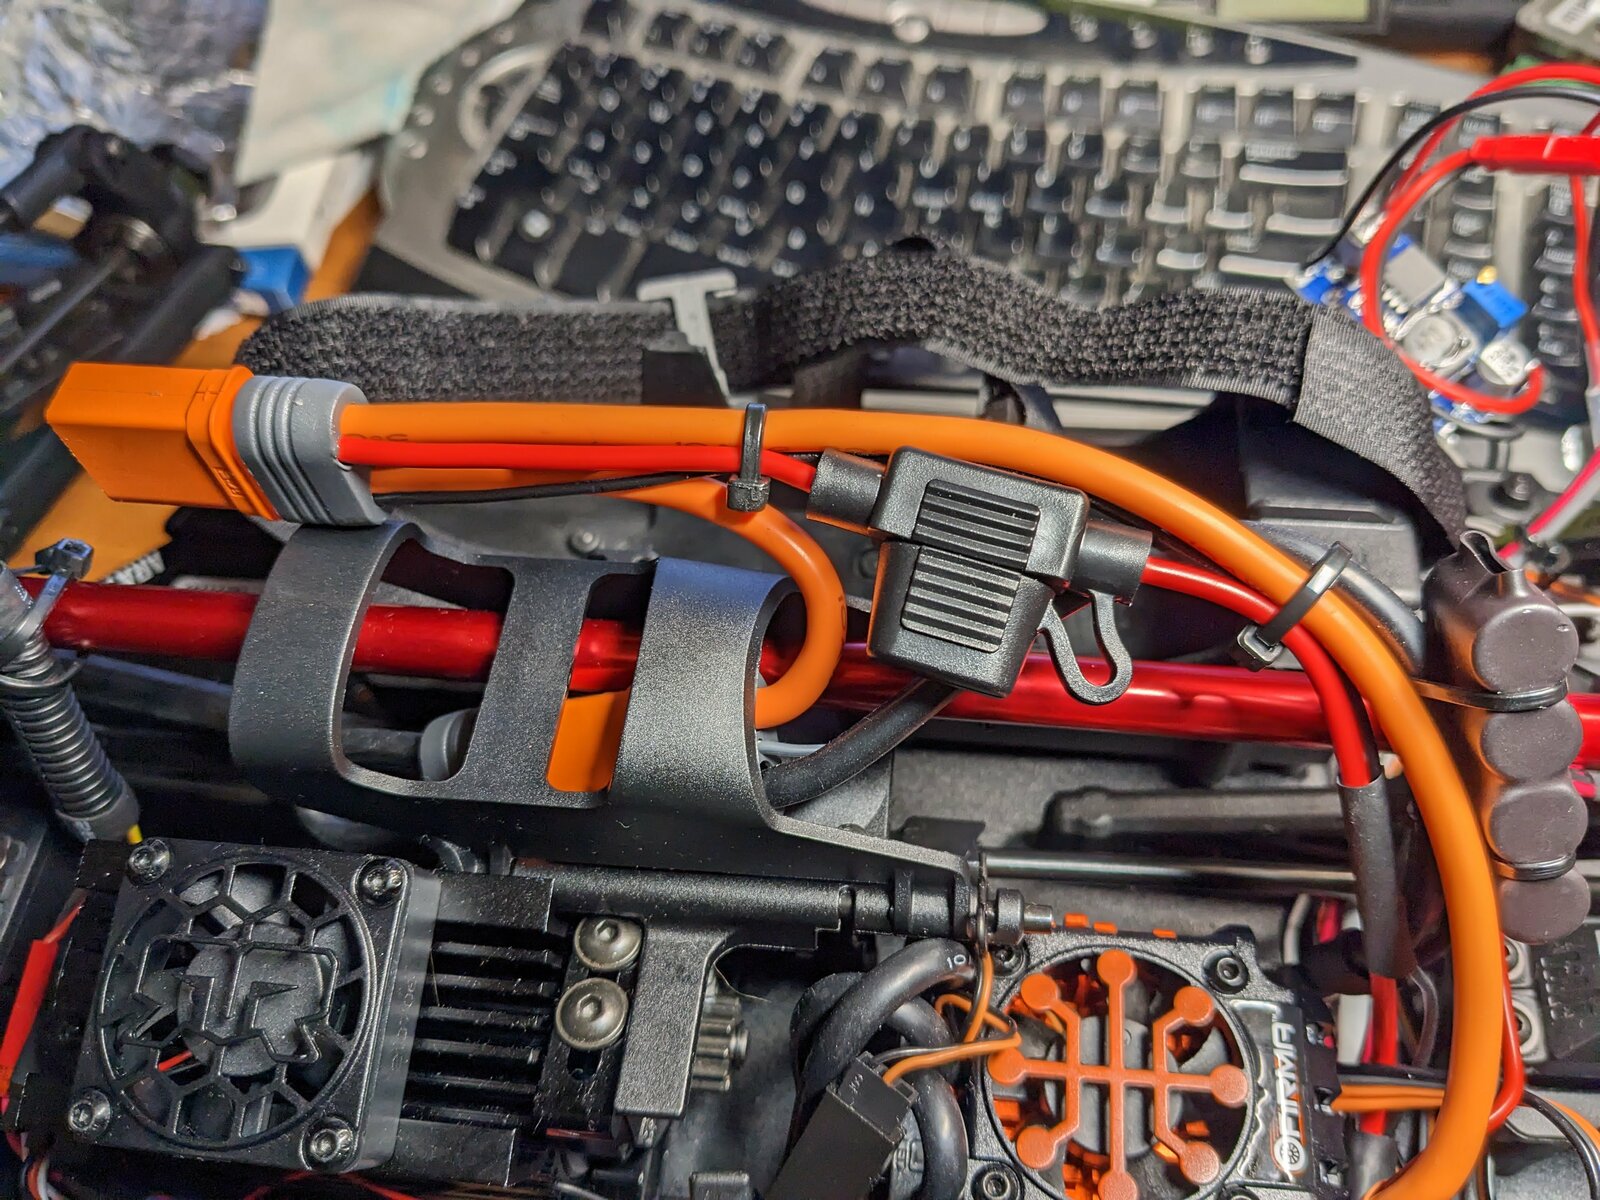
PXL_20230204_180043884.jpg


Bottom line; I have lots of electronic components I have to shove into the receiver box.
This is just the converter and a channel relay switch along with the receiver and a winch controller. I will also have to add a lighting box with the blinkers and such which I will have to put in a different box.
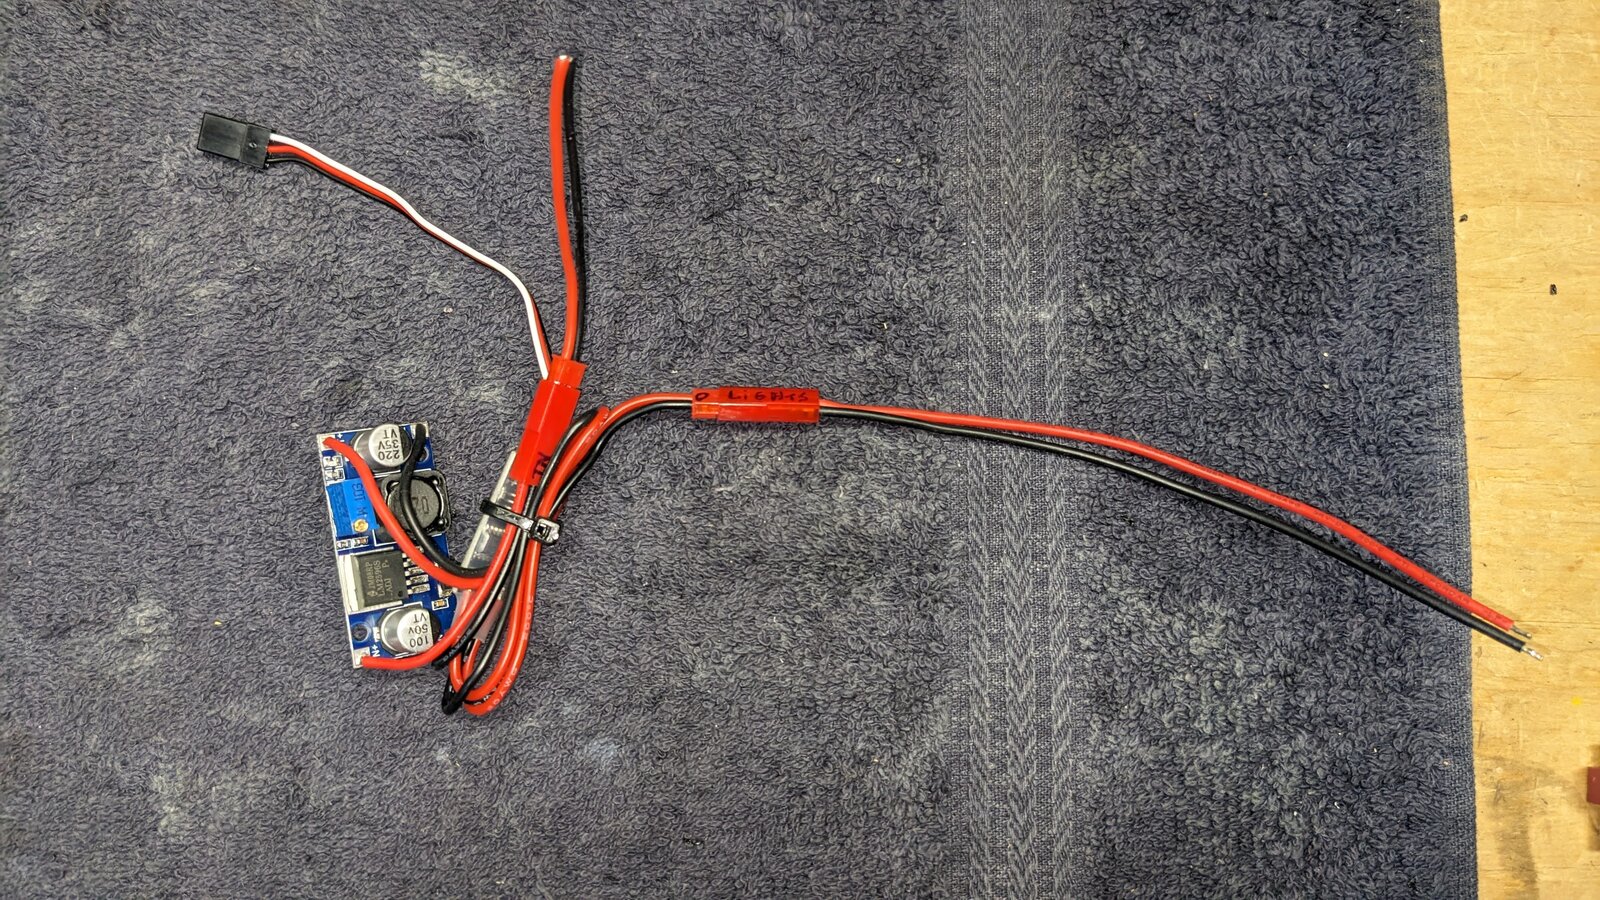
PXL_20230805_075836692.jpg


With this F450 I have a lot of room, so I am designing a receiver box that can hold all of this.
With my other cars, room was tight so I had to design extension boxes that extended the volume of the original box while still retaining the so called waterproofness of the box.
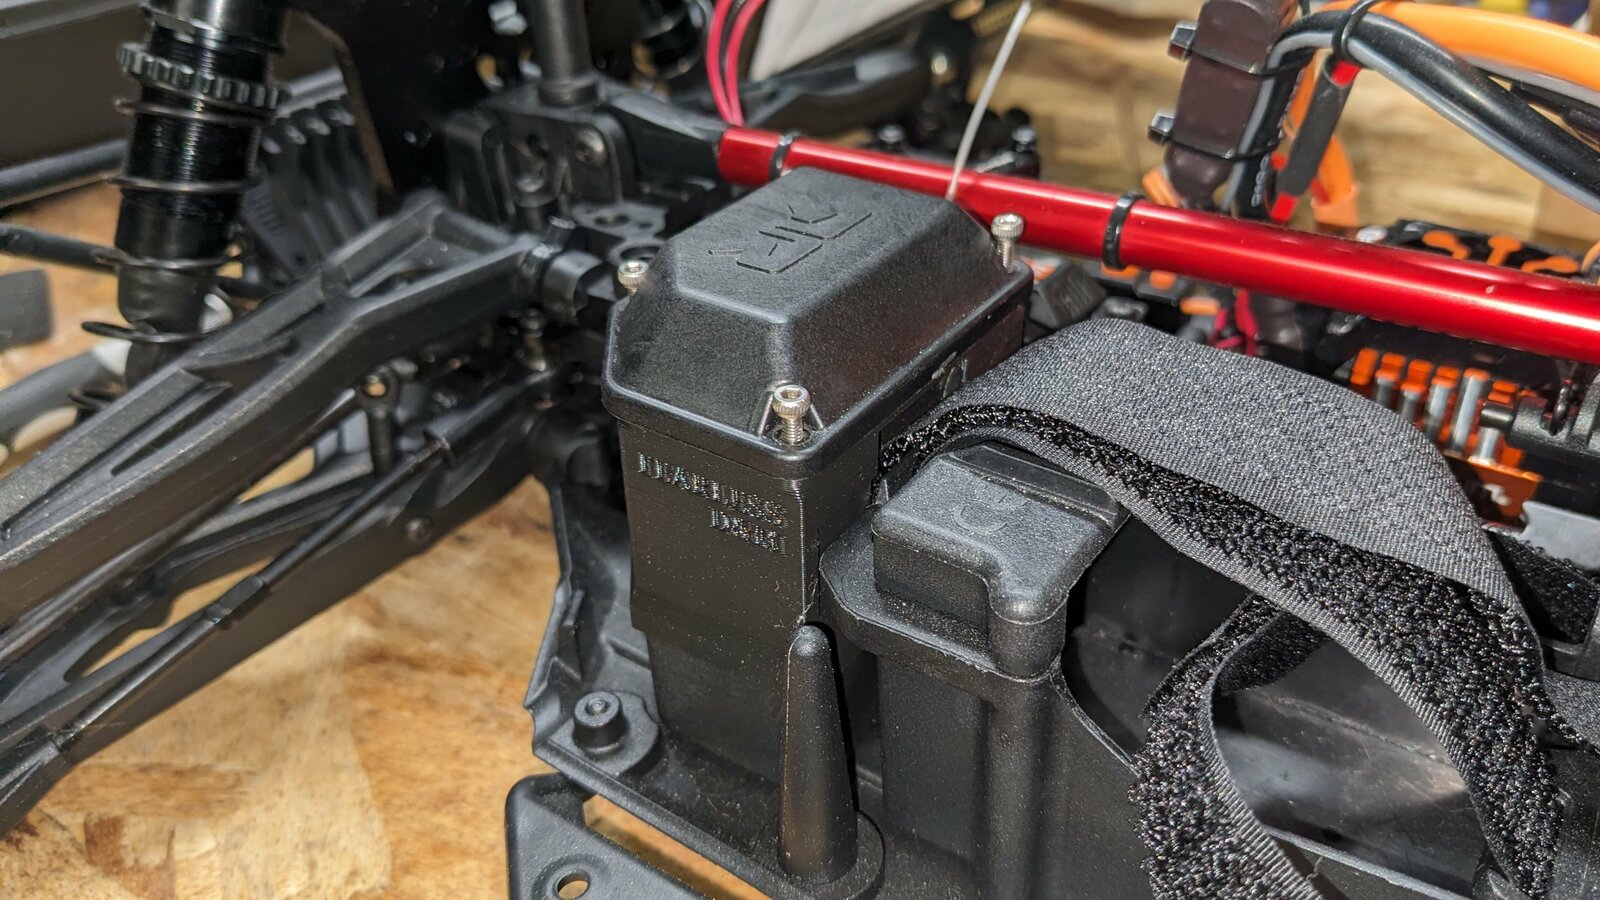
PXL_20230805_072549418.jpg


PXL_20230806_020611575.jpg


These work but are a pain to design due to the area I have to work with.
This new box is without constraints since I have so much room in this truck.
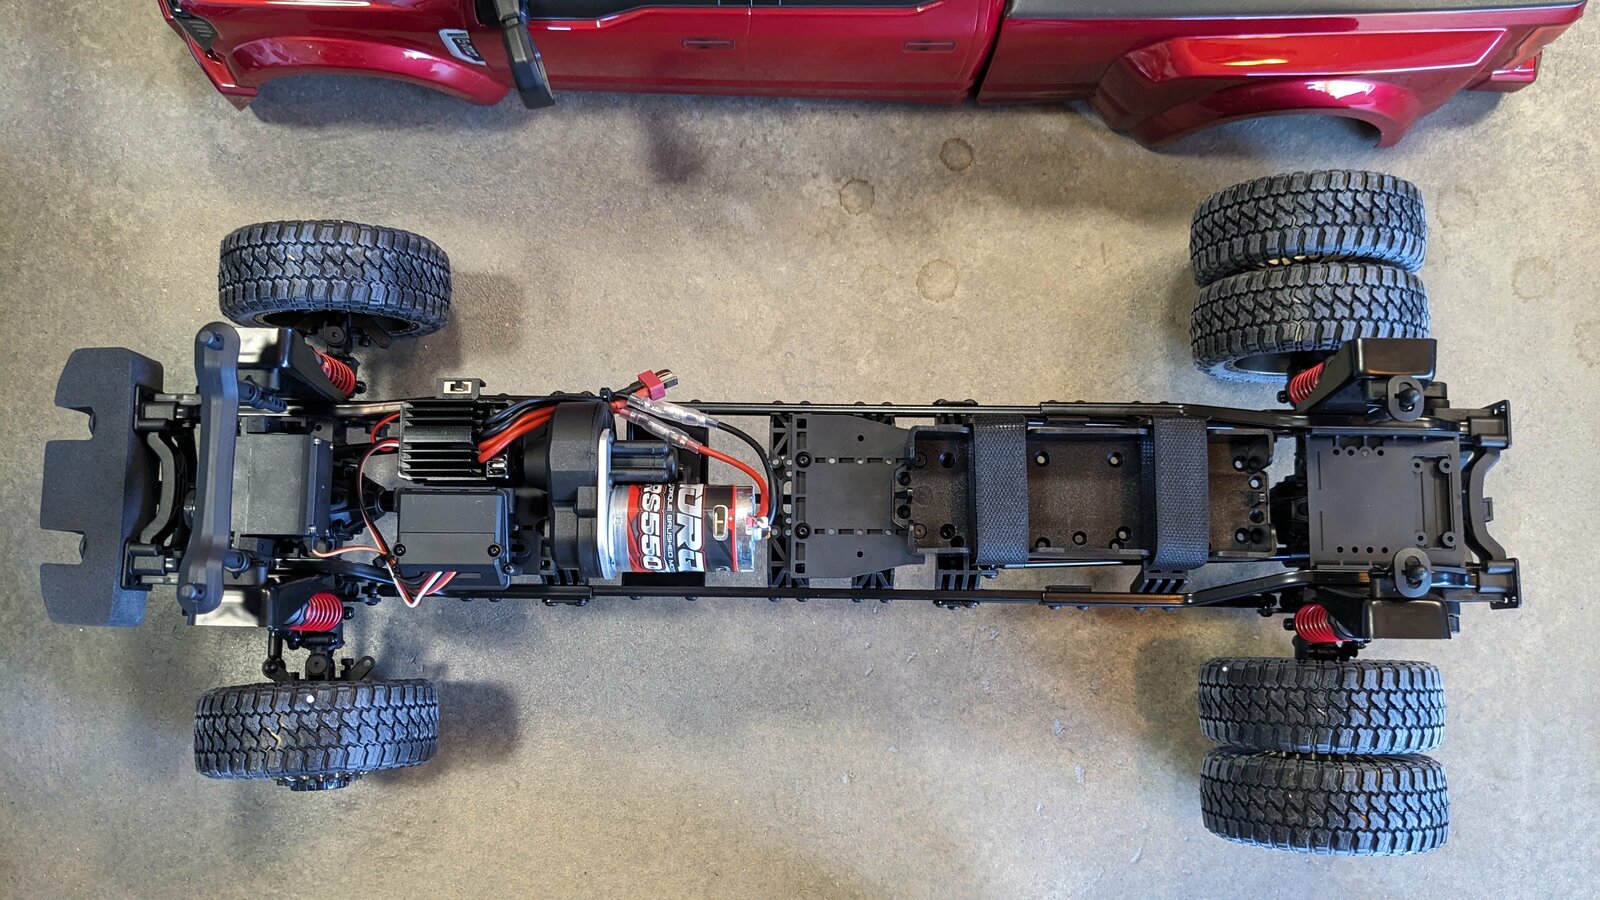
PXL_20230803_002813336.jpg


I had already switched out the receiver and the box to this but there just isn't enough room in that box so I have do make my own.
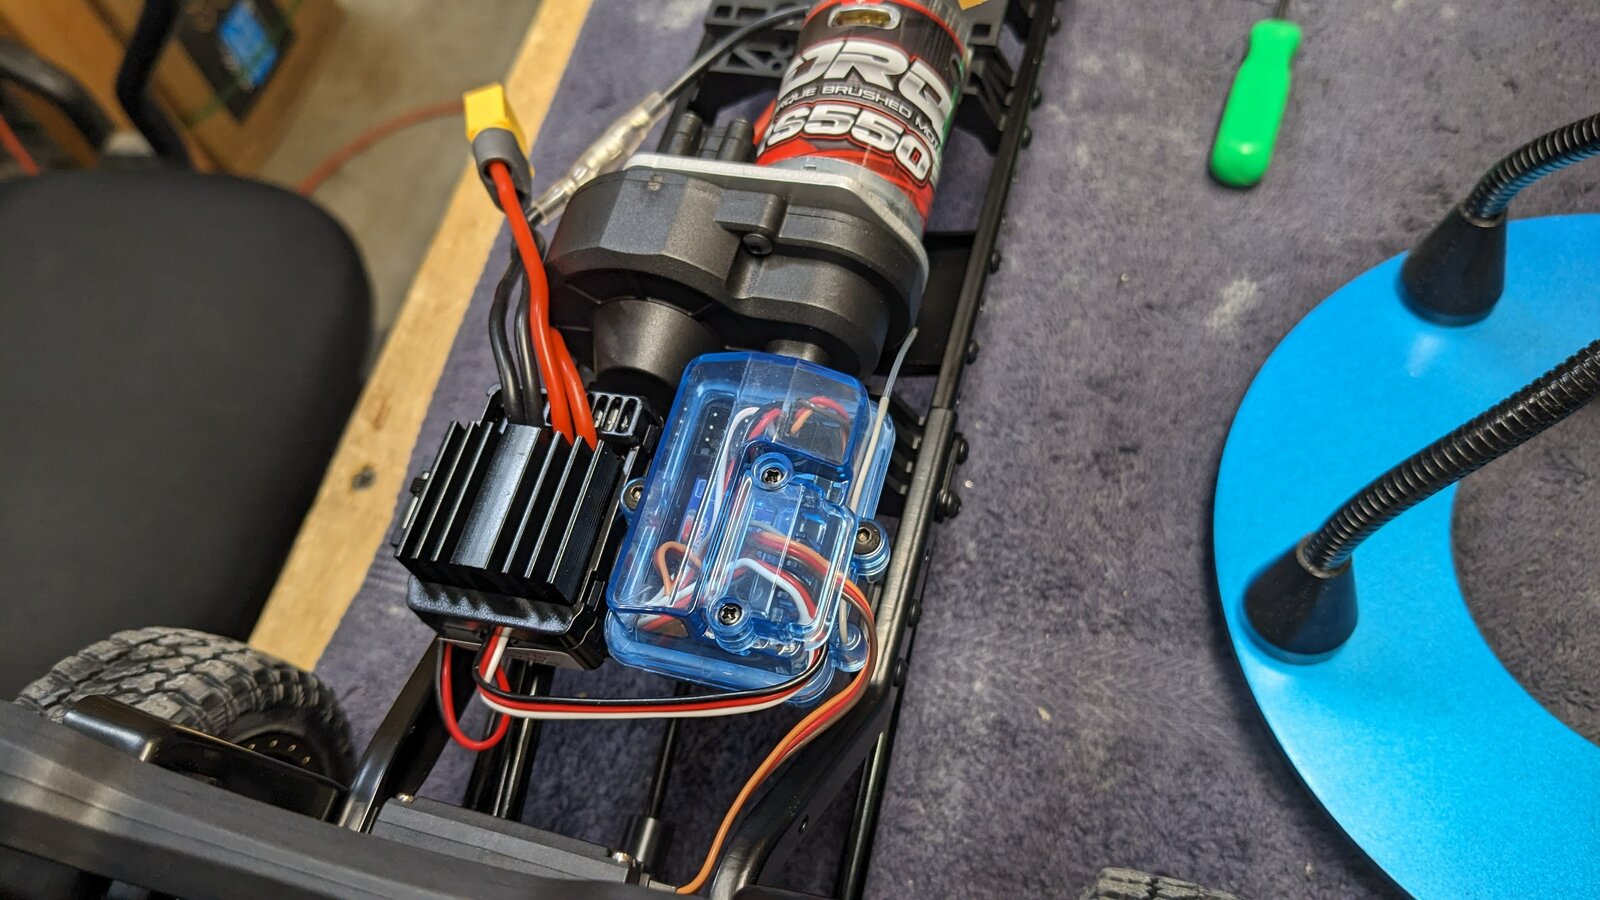
PXL_20230803_045812944.jpg


I looked on the various 3d print sites and could not find a decent waterproof one so I am designing one myself but I would like to get some input on what others might want in a receiver box.
Here is what I have so far.
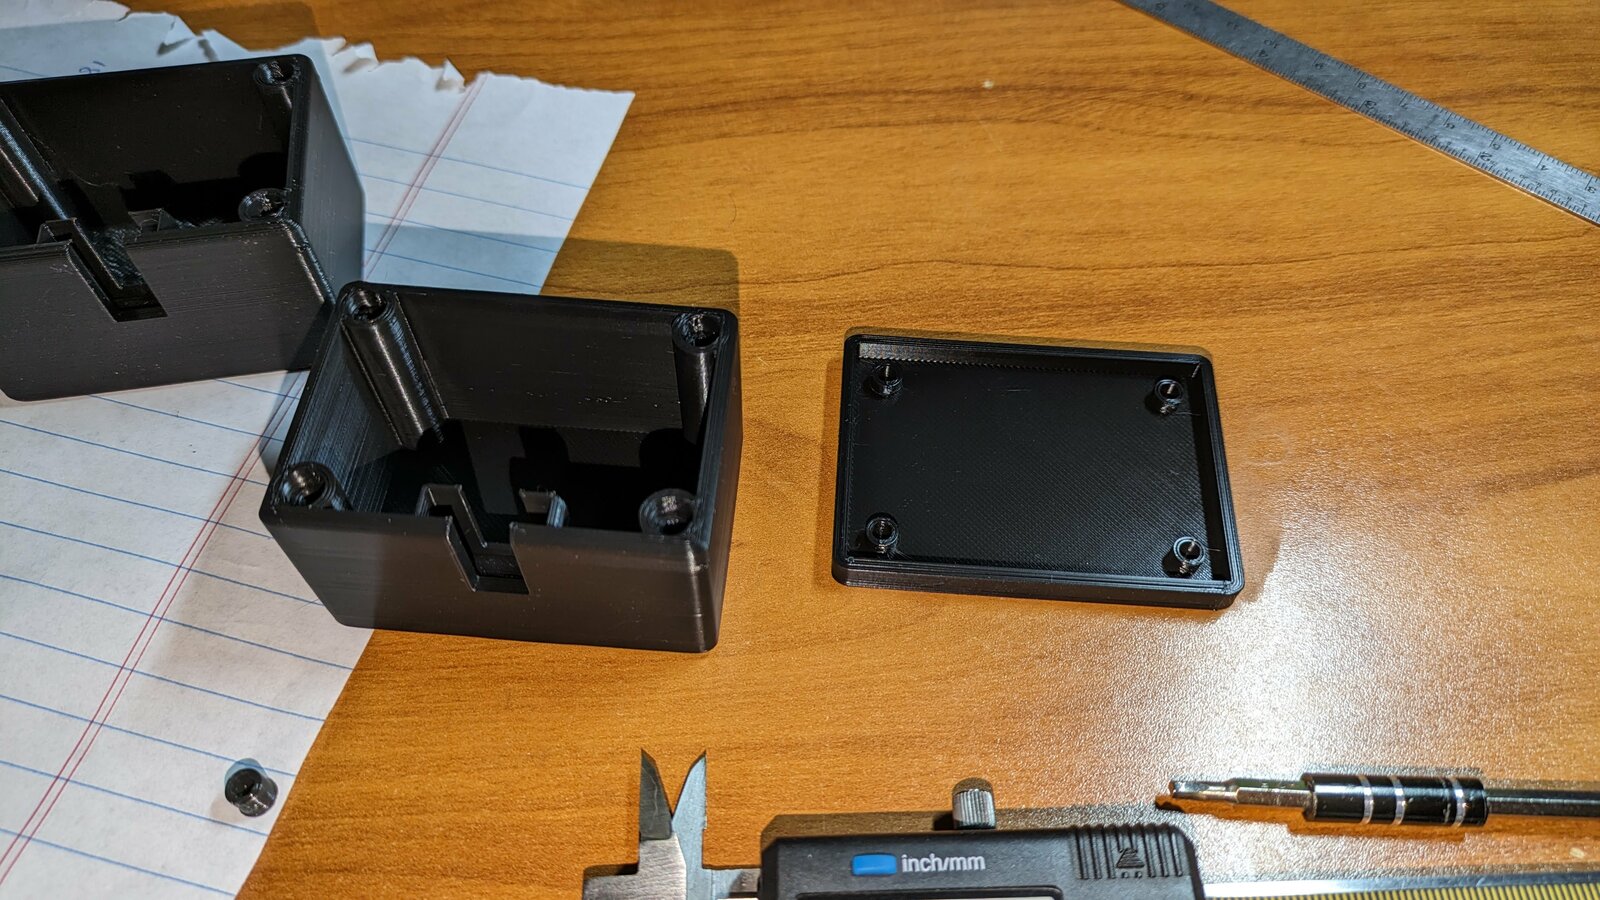
PXL_20230128_102248502.jpg


It is about 55mm wide and 32mm tall and 33.5mm deep
Got a lot of ideas for water resistance like foam or a rubber band on the lid, beveled outer edge for water resistance, drip holes where the screws are, and a foam wall for the wire door.
I am also unsure of the antenna placement spot. Maybe all four sides and you break off the ones you don't want?
Also does anyone know of the exact ID and OD standard for an antenna tube? Is there a standard? I like the idea of having a antenna tube next to the receiver box that keeps the antenna out of harms way. Also placement of the antenna. Is it better to have the antenna high above the electronics? Maybe a holder on the lid if you have the vertical room?
Anybody else have any extra needs for a receiver box I am not thinking of?
Thanks for the ideas.
The black thing soldered to the main leads is a buck converted? And its connected to what after?
 
The black thing soldered to the main leads is a buck converted? And its connected to what after?
The black thing soldered to the battery connector is a fuse holder in case there is a short, the fuse will blow instead of the car gong up in flames.
PXL_20230204_180043884.jpg

The Buck converter is in the receiver box which lowers the voltage from the battery voltage to whatever I want which then supplies power for the lighting and sound systems.
PXL_20230805_075836692.jpg
 
Here is an update:
First prototype made.
PXL_20230909_063557590.jpg

PXL_20230909_063138485.jpg

PXL_20230909_063134277.jpg

Couple things I want to change at this point.
  1. Bigger Wire Wall Opening.
  2. Drop screw heads flush with top of cover??
  3. Add a antenna pole mount.
Anybody else have any other tips?
Thanks for the input.

Your Rx box looks absolutely beefy!

Perhaps make the lid convex like the stock lid to maximize your dimensions.

Yes to integrating antenna pole mount.
In fact make it on at least three sides of the box to give more mounting options.
Possibly for Dual antenna configurations..

Keep going, you're onto something. 💪
 
Printed velcro inside the box to attach the receiver. Not sure how well it works though in a basher.

Seems the velcro could be interesting to attach a temperature sensor to a motor. Just a hole in it on the one side for the sensor and the other side like a mat to keep it in place. Have not printed it myself. Here a video. That "velcro" pattern might even be useful to print a bit thicker mat and then fasten the lipo on it in the battery tray having buffer under it ( being printed thicker). And only using one strap in some rigs if it works. Perhaps it overcomplicates things. Not sure.
 
Last edited:
Printed velcro inside the box to attach the receiver. Not sure how well it works though in a basher.

Seems the velcro could be interesting to attach a temperature sensor to a motor. Just a hole in it on the one side for the sensor and the other side like a mat to keep it in place. Have not printed it myself. Here a video.

I'm not following you? The temp sensor needs to be in contact with the motor otherwise you get ambient temperature?

I'm a fan of Dual Lock. It's symmetrical and super strong. I can pick up my 15 lb Limitless by the ESC secured with Dual Lock.
https://a.co/d/41xFISb
1694298744695.png
 
I'm not following you? The temp sensor needs to be in contact with the motor otherwise you get ambient temperature?

I'm a fan of Dual Lock. It's symmetrical and super strong. I can pick up my 15 lb Limitless by the ESC secured with Dual Lock.
https://a.co/d/41xFISb
View attachment 321527
I am using kapton like tape to attach the sensor to the motor and ESC. But it get loose too often. Readings are not too exact. Perhaps a mat (stuck to the motor) with a slit (2cm * 5mm) for the sensor and then the counterpart to fasten down would work.

The dual lock tape looks good. Did not know it.
 
Using kapton tape for all my RC on the motor works great. I clean the contact area with alcohol as well as the sensor. Be sure not to spray cleaner on it like Simple Green and it will stay. Reads the temp great. It's just a reading does not cover the entire motor but gives a glance to see where temps are going...that's all.

Talion Hybrid
1694303970174.png


Talion
1694304070853.png


Lasernut
1694304273033.png
 
Using kapton tape for all my RC on the motor works great. I clean the contact area with alcohol as well as the sensor. Be sure not to spray cleaner on it like Simple Green and it will stay. Reads the temp great. It's just a reading does not cover the entire motor but gives a glance to see where temps are going...that's all.

Talion Hybrid
View attachment 321543

Talion
View attachment 321547

Lasernut
View attachment 321551

That reminds me.. 🤦
I still need to get some temperature sensor clamps made for you my friend!

46mm , correct?
 
That reminds me.. 🤦
I still need to get some temperature sensor clamps made for you my friend!

46mm , correct?
NP... Know you have been busy and me as well, getting moved in. I believe you are correct. I got the other set for the 36mm motors. I need something for those larger motors.... let me find that old message. Thanks for helping (y)
 
Your Rx box looks absolutely beefy!

Perhaps make the lid convex like the stock lid to maximize your dimensions.

Yes to integrating antenna pole mount.
In fact make it on at least three sides of the box to give more mounting options.
Possibly for Dual antenna configurations..

Keep going, you're onto something. 💪
That is interesting I hadn't thought of that one.
I do know that printing convex shapes is challenging, Maybe with some supports?
Printed velcro inside the box to attach the receiver. Not sure how well it works though in a basher.

Seems the velcro could be interesting to attach a temperature sensor to a motor. Just a hole in it on the one side for the sensor and the other side like a mat to keep it in place. Have not printed it myself. Here a video. That "velcro" pattern might even be useful to print a bit thicker mat and then fasten the lipo on it in the battery tray having buffer under it ( being printed thicker). And only using one strap in some rigs if it works. Perhaps it overcomplicates things. Not sure.
Thanks. This is also interesting. I will keep that in mind
Unfortunately I can see it being a burden if you get some dirt down in the box or the velcro wears out.
I think two sided tape works just as well as long as it stays dry.
 
Last edited:
I would still need supports on it's side and supports stink unless they are clean supports and they would not be clean on a convex. The only way I know to print that kind of shape is I would have to cut the object in half before slicing then print the two sides and glue the two sides back together after print.
I will look to see if there is an easier way.
 
That is interesting I hadn't thought of that one.
I do know that printing convex shapes is challenging, Maybe with some supports?

...

No.
Not necessarily if your lid is angled enough.

Just depends how steep your design is..
 
I would still need supports on it's side and supports stink unless they are clean supports and they would not be clean on a convex. The only way I know to print that kind of shape is I would have to cut the object in half before slicing then print the two sides and glue the two sides back together after print.
I will look to see if there is an easier way.
If it's ugly on the inside from support that's no problem. Only you will know (and me :ROFLMAO: :ROFLMAO: ).
 
Old Thread: Hello . There have been no replies in this thread for 90 days.
Content in this thread may no longer be relevant.
Perhaps it would be better to start a new thread instead.
Back
Top