
VossieDJ
Active Member
I'm looking forward to taking part in the forum discussions and taking you all on my journey of upgrading my recently acquired second hand Notorious.


I acquired the second hand Notorious for a steel on FBM and looked okay on the photos. However when I got it it was a bit worse for wear.
Rather than make a fuss, I thought I take on the challenge of repairing it.
First was to figure out what version it was and finally figured out it is the V3 Notorious, but what a mission to get the manual on line. Through some trial and error I found it on Amian hobbies. Hooray!!!
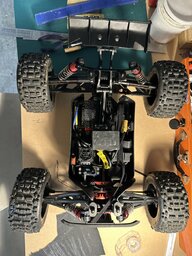
Now for the fun to begin. Unfortunately I didn't take photos of it all, but in short I took the whole car apart, some of the fixes:
After the upgrades and repairs I took the Notorious out for its first bash. Wow!!!! What a beast. I've not had this much fun with an RC car.
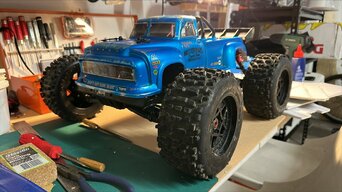
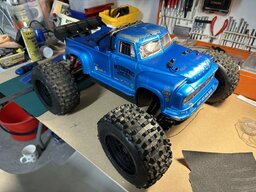
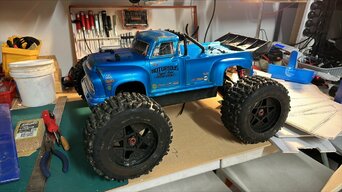
The Notorious needed a bit of a clean and tightening of screws. Locktite needed. Haha
Some more photos cleaned and polished.
I acquired the second hand Notorious for a steel on FBM and looked okay on the photos. However when I got it it was a bit worse for wear.
Rather than make a fuss, I thought I take on the challenge of repairing it.
First was to figure out what version it was and finally figured out it is the V3 Notorious, but what a mission to get the manual on line. Through some trial and error I found it on Amian hobbies. Hooray!!!
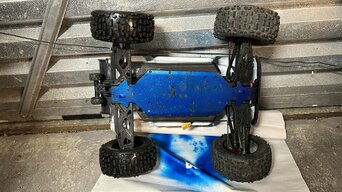
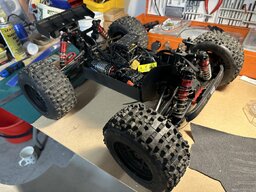
Now for the fun to begin. Unfortunately I didn't take photos of it all, but in short I took the whole car apart, some of the fixes:
- Centre diff disintegrated- ordered a new one
- Front shock mount held on with wire and bent- straightened and replaced shock mounts
- Diff oil non existing- replaced with 60k/500k/30k wt as recommended by many on the forum
- Shock oil okay but did a refill with 1000wt
- New set of tires
- General clean of everything and replacing rusty screws etc.
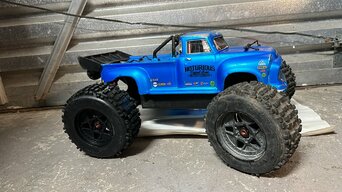
After the upgrades and repairs I took the Notorious out for its first bash. Wow!!!! What a beast. I've not had this much fun with an RC car.
The Notorious needed a bit of a clean and tightening of screws. Locktite needed. Haha
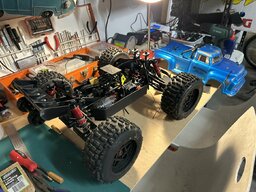
Some more photos cleaned and polished.
Attachments
-
 4A3D079D-A1D2-498B-96C8-C080AD2779BE.jpeg362.1 KB · Views: 41
 -
 5A888D4B-841C-4B0A-BB41-899109E5751B.jpeg283.5 KB · Views: 39
 -
 20230813_060140000_iOS.jpeg328.6 KB · Views: 49
 -
 20230813_060110000_iOS.jpeg319.5 KB · Views: 40
 -
 20230813_060005000_iOS.jpeg241.1 KB · Views: 41
 -
 20230813_060123000_iOS.jpeg340.4 KB · Views: 40
 -
 Scan from 2023-08-13 05_59_47 PM.jpeg205.2 KB · Views: 44
 -
 20230813_060046000_iOS.jpeg306 KB · Views: 40
 -
 Scan from 2023-08-13 05_59_09 PM.jpeg230.2 KB · Views: 41
Last edited:
") Must haves at a very minimum. JennysRC has the T2T itself, for very cheap. Like only $3.-$4. usually. Then buy the 2 Mounts for it retail online, Not that expensive to do the T2T update at all.
Must haves at a very minimum. JennysRC has the T2T itself, for very cheap. Like only $3.-$4. usually. Then buy the 2 Mounts for it retail online, Not that expensive to do the T2T update at all. , then taking it back to about 20% which proved to be most fun and with all the power could still pop wheelies (but not flip) mid acceleration